

Fooling around on a quilt mailed to nephew (nothing to brag about here but ...) - he complained "why don't I have my own quilt when all my sisters have one from Aunt Elaine?" ... So, now he has one. Here's another view. I tried to keep it somewhat gender neutral as I've only met his wife one short time. I got kinda "stuck" on those quarter log cabin strip designs during these last several years.
They wrote back that their 11-ish daughter noticed all the mountains, swirls, circles and heart designs that were sewn into the quilt. I have to know that arty youngter a bit better! The quilt was named "Listening" because I was hearing my Mom as I made it.
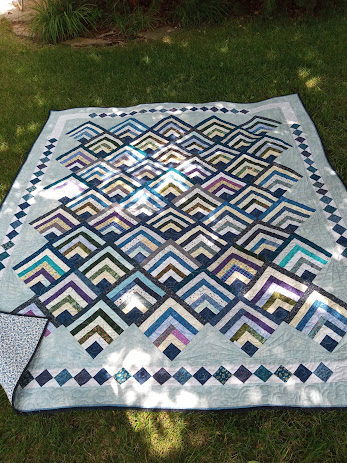
Over the Christmas holidays I offered to make a queen-size quilt for a friend who wanted something for her adult son (below). I agreed because she's a teacher and now THAT job I could never do, but I COULD make a quilt. His mother had started the project but ran into difficulties. We agreed - she would stay a teacher and I would stay a quilter. And, since I'd never made a quilt specifically for another person, I wondered if I would still enjoy the process. As it turned out, I LOVED making it and probably did a better job than if it had been for myself. Who knew that would happen? My friend had started with the star color theme, so I stuck with that.
Here it is, in it's almost-completed form a few months ago. I quilted it all on my Janome6700P, although I kept that last wide blue border separate, and added it QAYG, since the project was now very large. The recipient was happy as well as his folks. He then offered to help me put together a small sewing cabinet that had arrived in hundreds of pieces, so everyone was happy. 
Incidentally, I DID have those hanging squares perfectly meeting at each corner (yes, using my special formula for that tedious technique) but decided it truly was just too much! So after removing a few, it truly was better - a good solution to remember. I have a permanent image of me dragging a partially finished large quilt from room to room, meeting my demise by tripping on it and breaking a hip! I wonder if a quilt would break my fall and then ......
Happy Independence Day July 4.


