My downloaded photos are going somewhere - I can't find them. No one needs these aggravations.

I am a quilter - a retired widow living in the Nebraska Panhandle. I am surrounded by beautiful semi-arid ranch country, and treeless hills and fields under incredibly wide blue skies, located far from the upheaval found often in large towns or cities. I am blessed to have delicious time to quilt and to appreciate my peaceful moments in an unpeaceful world.
Monday, December 14, 2020
Saturday, December 05, 2020
NQR - Unwallpapering, and home improvements
I've lived in this house for 22 years and had planned to remove this wall paper as the first home improvement. A friend about my age visited me recently and she said she used to visit in this house as a little girl, and clearly remembered the wallpaper! LOL So, that got me moving. Tried the hot water and fabric softener sprayed on the wall -- didn't touch it. A trip today to Menards and I came home with a wallpaper steamer gadget, and yes, it's working, but still a mess. I scored it all, with a "tiger" gadget, which makes little holes in the paper to soak up the moisture. It's taking 2 separate efforts for slow removal with a putty knife because every bit of wallpaper, so far, comes off separately from the kraft-type paper behind it, so that's double work.. Behind kraft-type paper is another very thin layer of something, white, some kind of coat - no one to ask, I'm going forward. That thin coat is staying in place in most spots but I'm not sure what it is. I'm sure there will be some sanding, primering, etc., before a final painting of this living room. I'll "call the man" for that job! I'm planning new carpet hopefully by June (another "call the man" job) so this pain in the patoot needs to be completed first. The wallpaper fortunatly does not go to the coved ceiling and is only on parts of the walls. Moving curio/chatzky cabinets will be another issue.


I laid down a plastic tarp, towels at the baseboard, brought a large tote to try and corral all the bits of paper. NOT pretty site, is it? Hope I don't get over my head. I covered the light switches in blue tape for safety.
On another front, my kitchen countertop and backsplash tiles are unloaded, so that will be the first job to get done. The installer said I'm "next" on his list.
I DO have a QOV in process and am machine quilting between sessions of this unwallpapering project.
Sunday, November 15, 2020
Log Cabin QOV
Investigating into a closet, I found an entire box of red/white/blue fabrics, obviously forgotten. There was even a book wrapped inside the fabrics. For me, "out of sight, out of mind"! (That also works in reverse when shopping!) But I made this Log Cabin recently. And I must admit to using that 8 in. Log Cabin Trim Tool, to justify purchasing it years ago, and frankly, I liked it. Sometimes I get too casual and careless when sewing a simple pattern but using the Trim Tool kept me much neater, more precise. My border finishes at 1 inch white, 2 inch for red, 3 inch for dark blue. I use that 1,2,3 calculation a LOT for borders.

Stay well and safe, everyone.
Sunday, November 08, 2020
NQR - Appliance Repairs - A Learning Experience
Dishwasher would not open - it had already run it's cycle and I was planning to empty it. Nope, would not budge. No way to open it. Handle just wobbles, ineffectively. Me? lots of boohoos, swearing, etc. Another unasked-for trial as a widow.
Finally searched YouTube, "Amana dishwasher won't open" and came on a bunch of videos, tutorials, one showed my same dishwasher. He suggested a clever way to open it, and that worked. OK, it's open, at least I now have clean dishes and silverware. Apparently this not an uncommon problem with this appliance. The video said I needed a particular kind of screwdriver/wrench that was strange sounding to me. Groan, don't know what that is but got brave and went out to garage to poke around Robert's tools Amazingly, there it was - all in one box, a very fine looking Craftsman manual screwdriver torque wrench, with a bunch of heads, all diff. sizes and shapes, stars, squares, points, etc. I needed the "star" shape, very small to get off the screws in the dishwasher door that I had to be removed to access the broken handle part. Of course I am nearly sitting on the floor, up and down, up and down, exhausting at my age, but I DID learn how to change the head, which way to lock the wrench, depending on if I was turning right or turning left. It's a beautiful piece of equipment and looks unused.
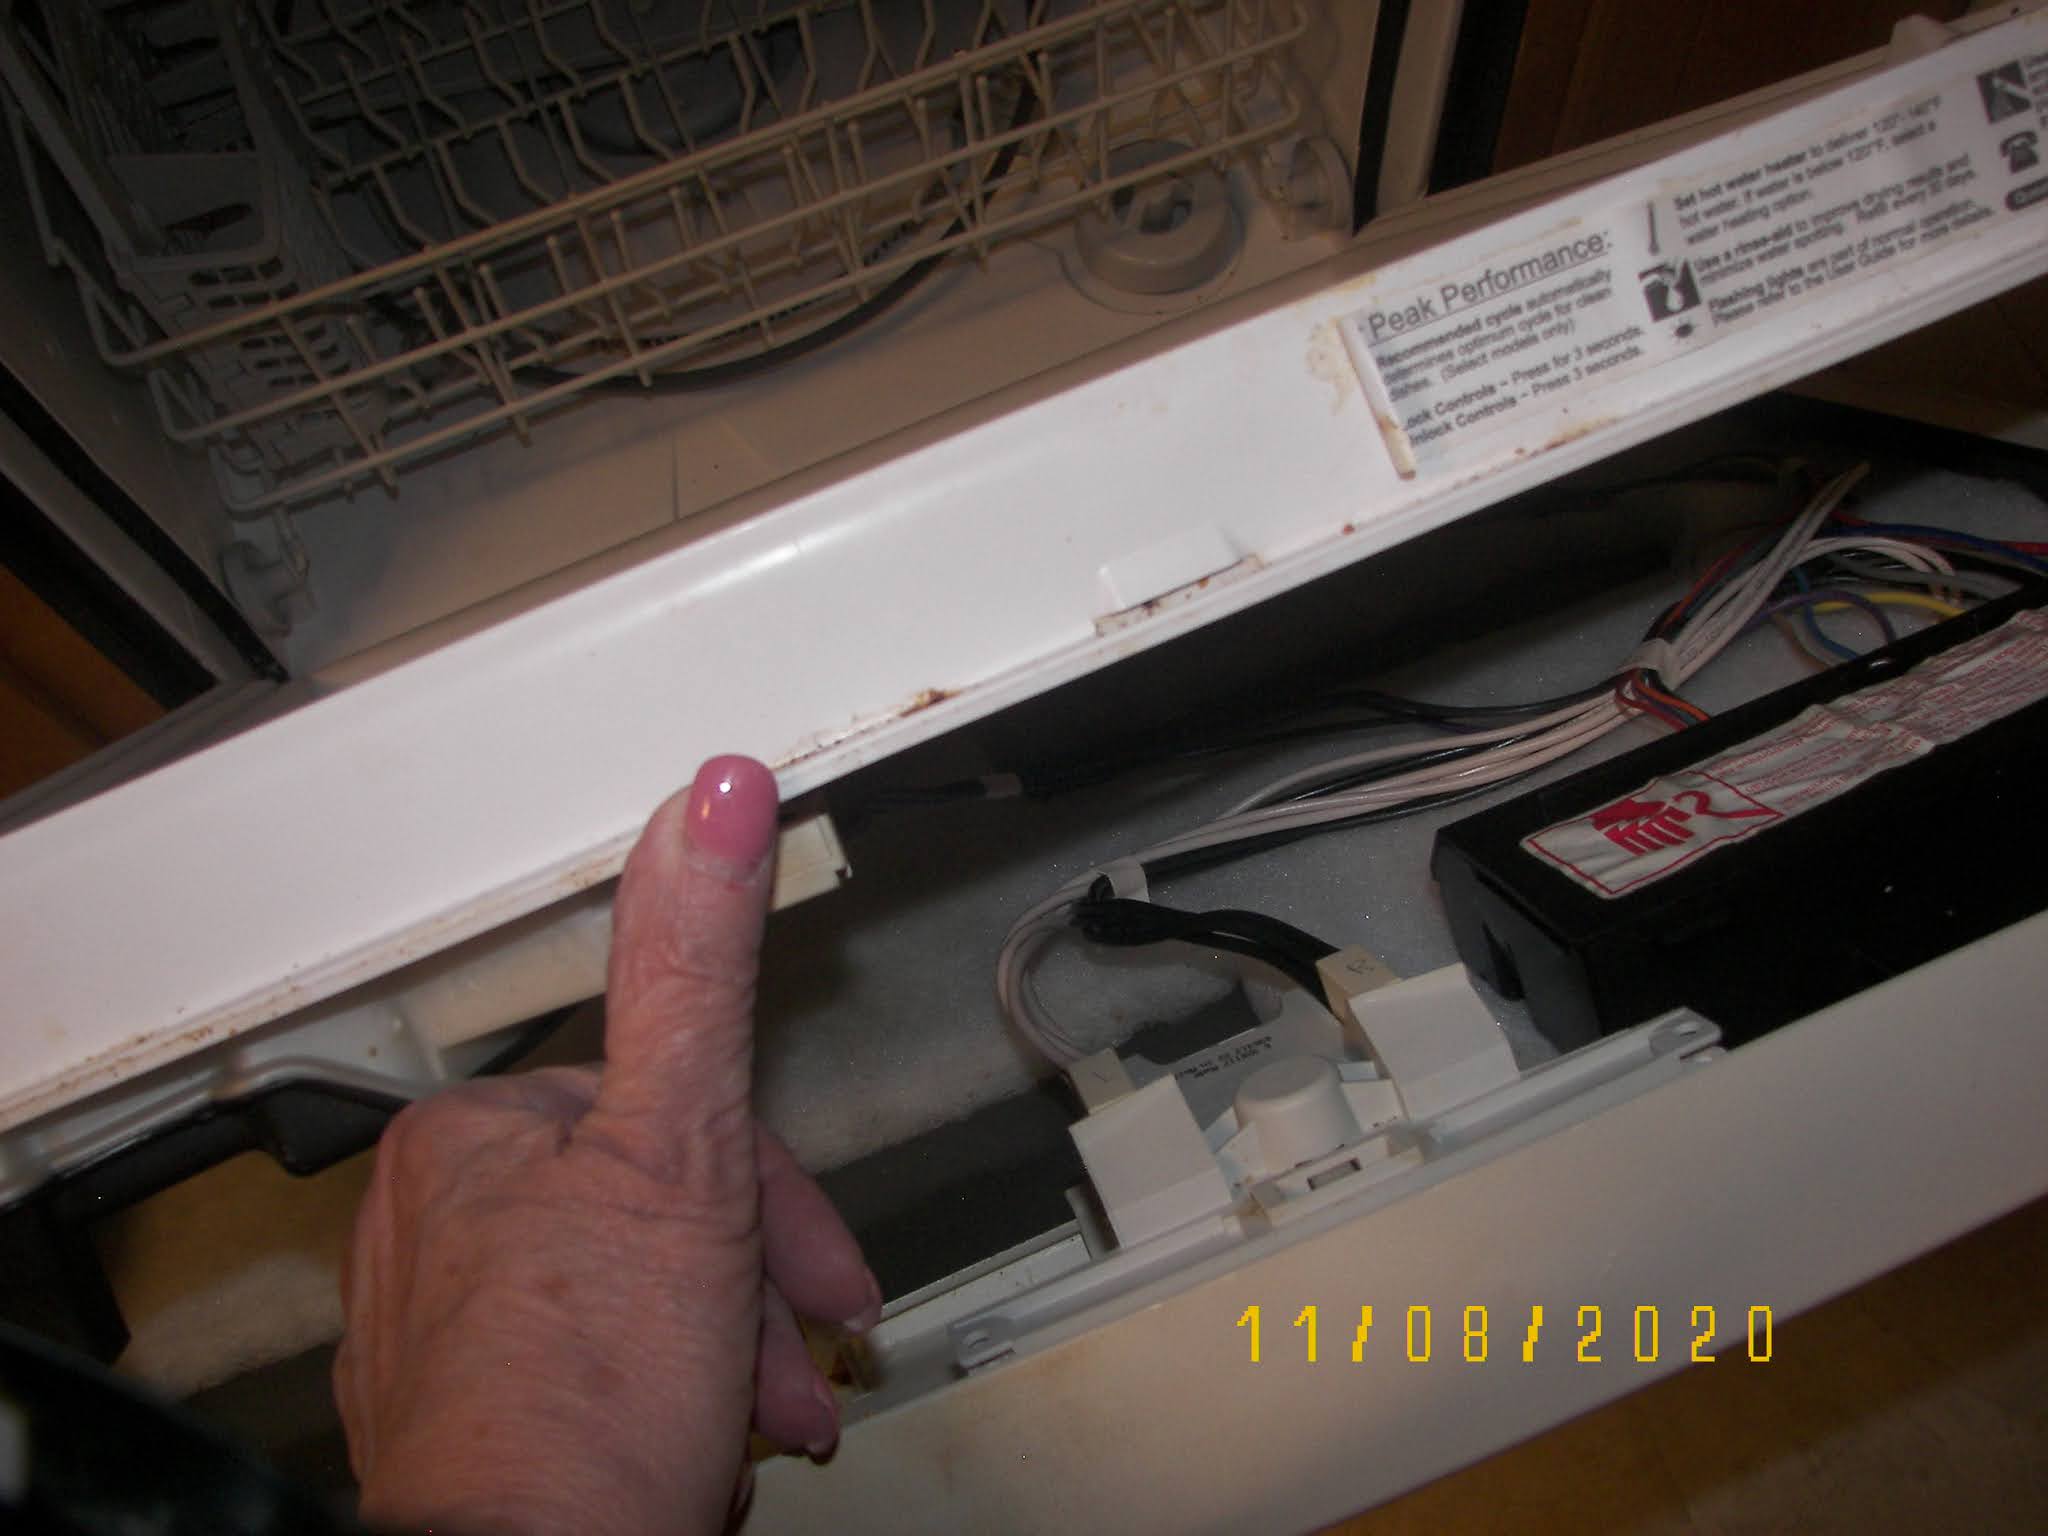

OK, found where I turn off the correct breaker in the basement when that's necessary, watched the easy-to-fix YouTube tutorial, found the site to buy parts, but that was confusing. My dishwasher is 15 years old and part numbers change. Found the almost right part, model, etc. There are/were 7 diff. numbers I kept looking for. After reading all the customer questions and reviews, I ordered the part they suggested even though it didn't match my current part number. The comments even included several mentions of "the video had more information than I think I need", just like my part showed, so I think it might work. We'll see when it arrives! It does look like an easy fix, at least on the tutorial that featured my same dishwasher. The hardest part was getting the screws out, but when I switched to a smaller, sharper 6 point head, it opened the screws easier. (Getting up off the floor umpteen times was no walk-in-the-park either!)
As exasperting as this is/was, it was satisfying to follow the instructions, find the part, learn about turning off power, choosing the right little point on the Torque screwdriver. I am patting my own head. Robert would be proud of me and would have patted me on the head in approval. OK, now I'm boo hooing, thinking of him watching me struggle thru this exercise.
As my Mother would say, "My dear, just think of it as a learning experience." 😕
Sunday, October 25, 2020
Green, Green Fields of Home ... ???
No green in this yard, due to heavy snow today! But I do have fond memories of early life on a small farm in Illinois. The early green alfalfa fields were a favorite, and especially, those pink/lavendar blossoms.
Here is my latest project - another "Pineapple, Green, Green Fields of Home"- I seem to be obsessed with them. I've used a lot of greens in the blocks -- notice there are 2 different block layouts, similar to 2 or 3 I've made previously. All the blocks are made with different fabrics, all scrappy, with the same light, slubby muslin. There are a few "odd" blue and/or gold blocks. Calculations on the inner border were successful, first time around, thanks to Gyleen X. Fitzgerald. I purchased her DVD from Annie's Craft, "Learn to Quilt With Scraps: Stash to Treasure".
. 

Stay healthy everyone! Thank you Mom, for helping me learn to sew!
Thursday, October 08, 2020
Small Blessings to Brighten up the Day.
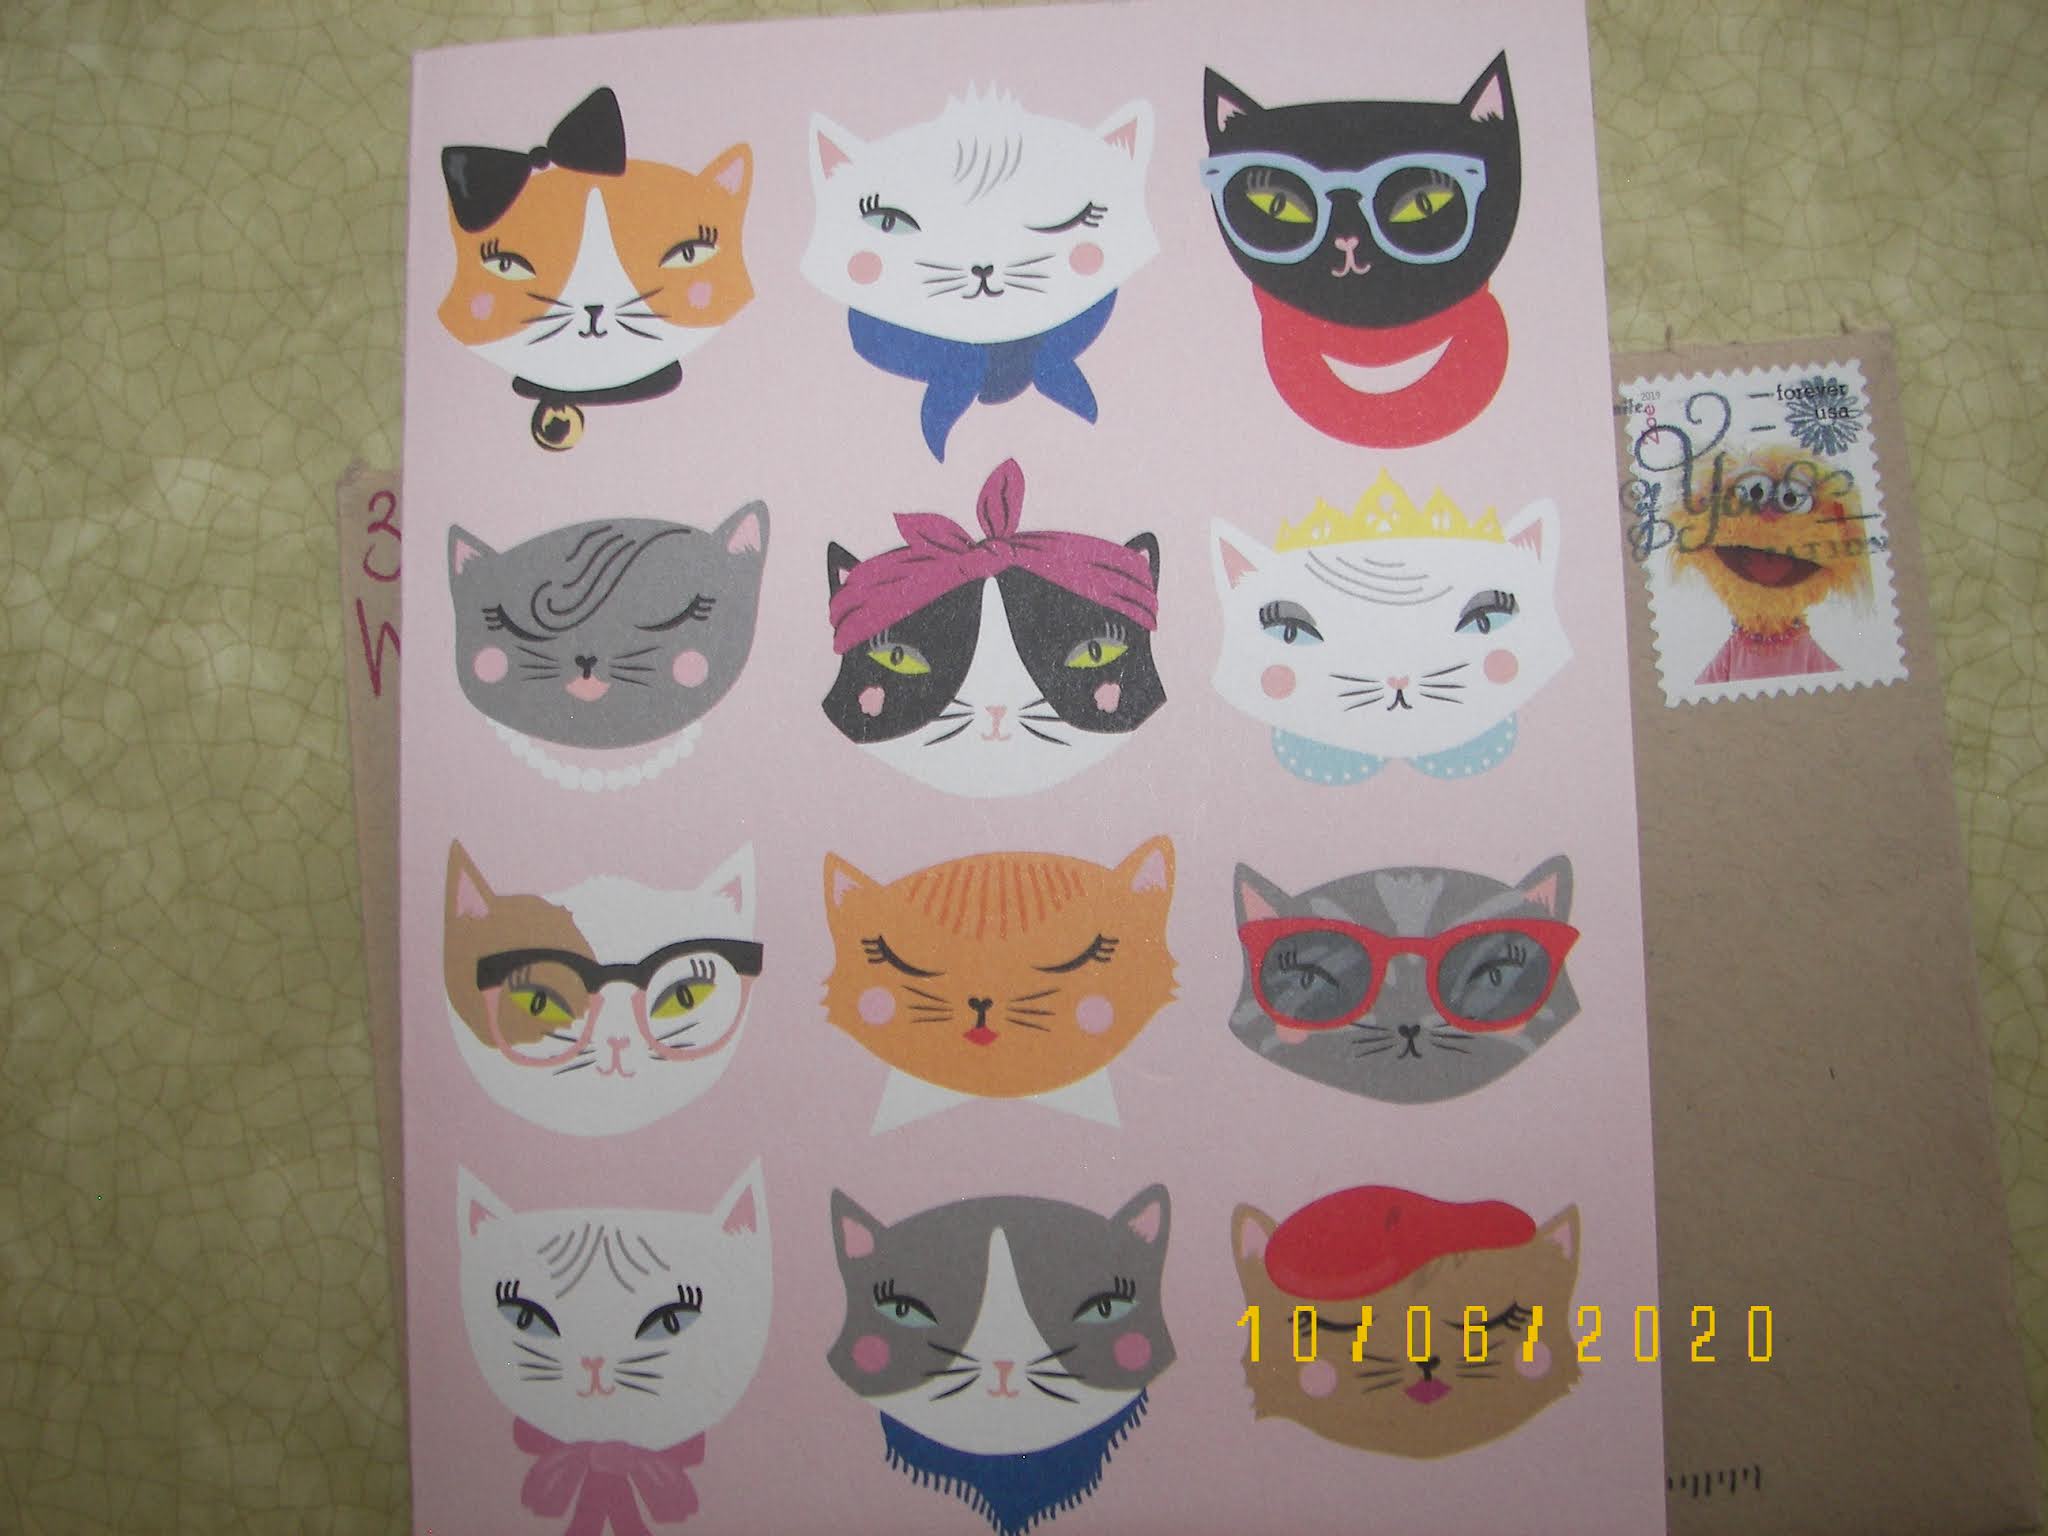
My previous post featured a quilt I'd given away and it's new home with a 7 yr. old great niece. I recently received a Thank You note from her. Look at her little quilt drawing! Is that cute or is that cute?

(I covered her name.)
The notecard itself was over-the-top dear!
Thursday, October 01, 2020
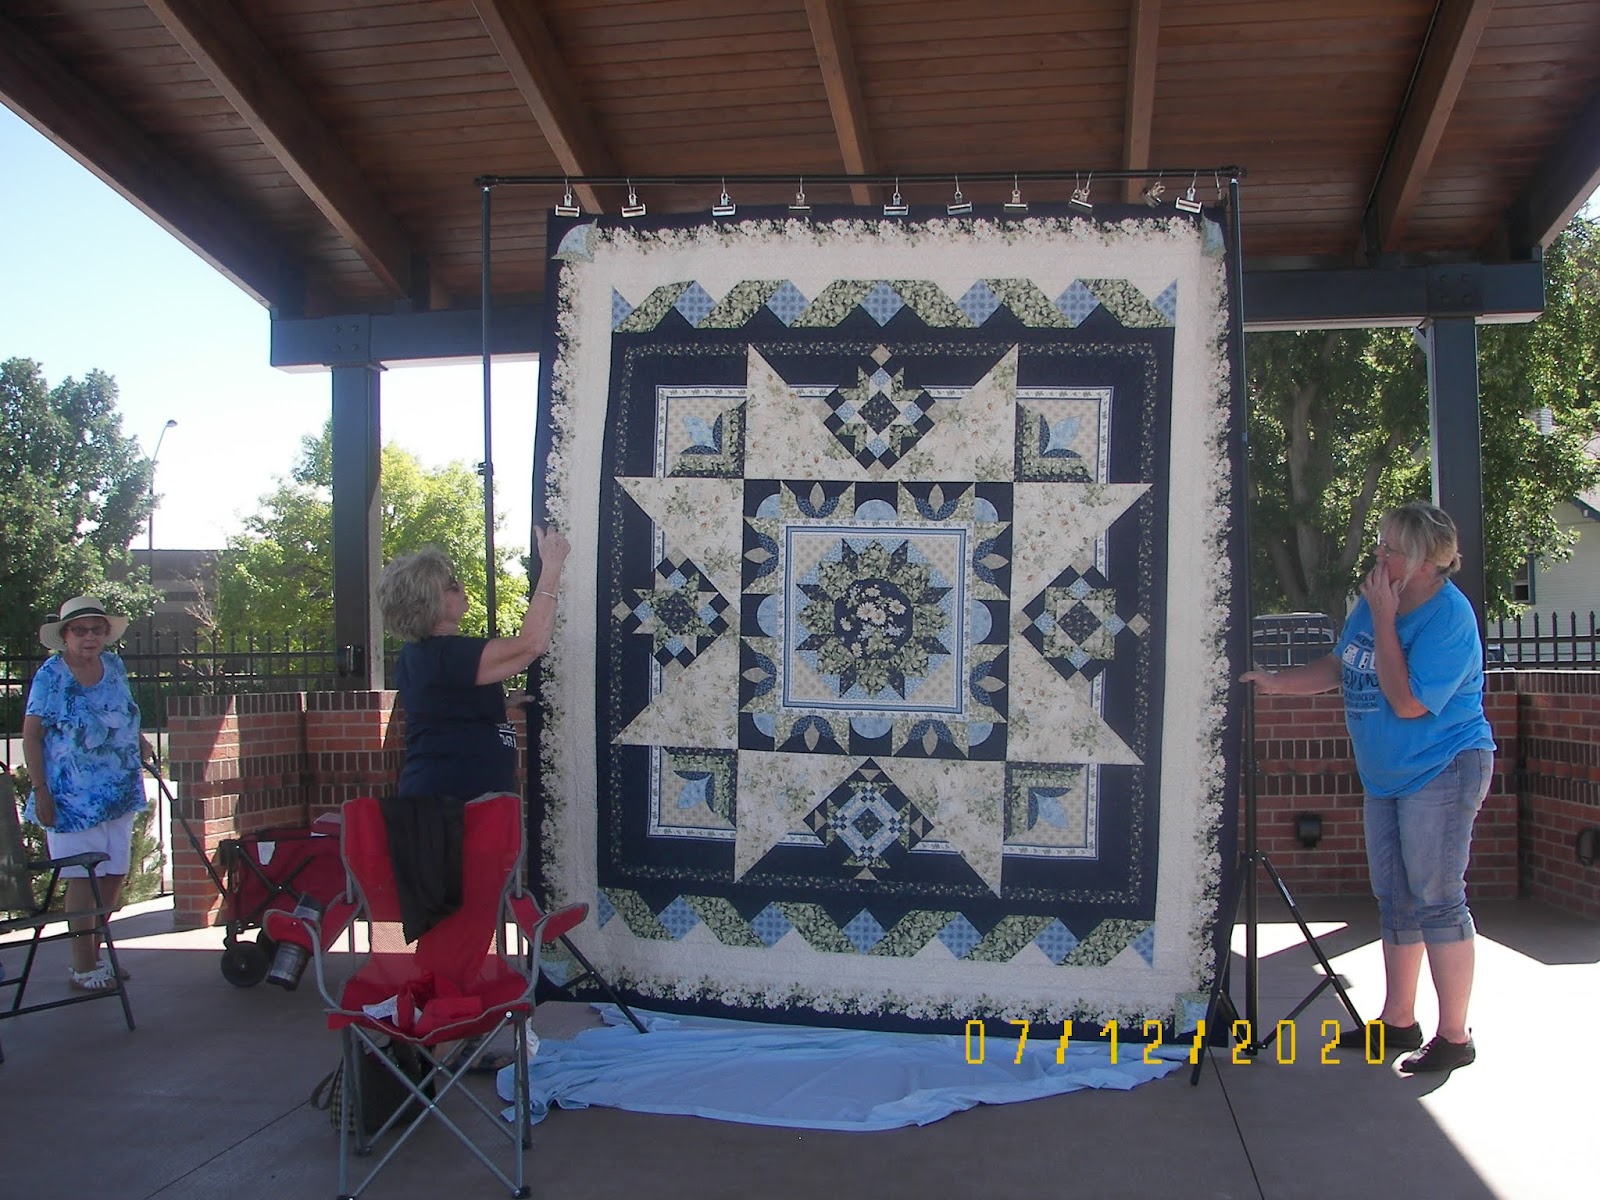
Road Trip and Home for a Quilt
I recently returned from a Road Trip that included a stop in northeastern Nebraska, then headed east across Iowa to southern Wisconsin, then south and AROUND Chicago to where my folks had their farm in Richton Park, Illinois, then I picked up a Girl Friend from High School in that area, and she came home with me as we drove west back across Iowa, returning to my home in western Nebraska for a very nice visit, then she returned by plane back to her home -- 2093 miles on my Odometer - I always did LOVE to drive! It is miraculous that all 3 of these destinations to visit friends and family could be managed with just ONE trip.
In preparation, I had loaded up one finished quilt, hoping a relative would give it a good home. Ya think this 7 yr. old great-niece likes it?

Friday, September 25, 2020
Tried to pay the toll in Illinois - warning - a RANT!
I've never had a library fine, no tickets, no accidents, but due to unexpectedly ending up driving on an Illinois Tollway, I missed one unmanned (!) toll, and drove thu another unmanned (!) toll which had money/credit card slots and baskets taped shut. I had been prepared for emergencies with a basket of quarters, just in case. I won't mention my Nebraska plate, no Transponder Pass on my windshield, heavy traffic speeding at 80 mph, and I didn't want to be on this xxxx tollway in the first place. (And, I usually drive in a town with just 5 traffic lights.)

10 days later, recovering at home from vacationing, I remembered to rectify this error and went on-line to determine how to pay for 2 tolls. My Illinois friend who is visiting me also assisted my efforts, and both of us assumed this would be a short, but tedious venture, and my honest nature insisted this was the way to go. This is a normal oversight and Illinois has kindly (?) offered multiple pages on line to assist. After much information-overload, and assurances of "EASY", my patience came to an end. I no longer enjoyed hearing helpful information, encouraging patience from my dear friend who is offering assistance. Two and a half hours later, needing new passwords, opening accounts, warnings of "didn't match", enter your mobile cell phone (the WORST, trying to get that to "take"), I'd had enuf, and slammed my computer closed, and checked the frig. for old wine. My friend and I are still speaking.
I think I'll receive an invoice, possibly with a fine, or fee or who knows what. This was really one of the most aggravating experiences I've had.
My sewing machine is beckoning me.
Monday, September 07, 2020
MORE Pineapple - "Green, Green Fields of Home"
Fast arrangement, a WIP - There are two block, set alternately. The alternate "O" rings do not show as I had expected. By including a light neutral around that central brick color of the "O" rings, it causes the eye to jump right there as opposed to first noting the diagonal design across the quilt. As in the past, I used Gyleen Fitzgerald inspiration and her pineapple ruler. While there are other good rulers, hers is clear and uncluttered. These are all 8 in. fin. blocks, and are greener in person.

(I was playing with filters, colors should be evenly darkened)
Below is Pineapple Parade, made a while ago, same pattern, but the centers of the "O" block were left all dark. Both quilts are still scrappy, but that very small change from the above center DOES result in a more apparent diagonal design.

And again, this one from years ago, the center of the "O" block remain dark. BTW, it's finished, won a First Place, and is somewhere in a closet! I guess you can guess this design is a favorite!

Saturday, September 05, 2020
Pineapple, "Green, Green Fields of Home"

New subject:
Some of you are have asked how things are in my quiet home, following the passing of my dear husband. I'm doing well as expected and am very aware of my many blessings. There is a season for everything - he always said "Make Every Day Count" and I'm doing my best. I am eternally grateful for our years together, and now for my friendships, here in blogland, and in my "real life". 8-)) I am well and healthy, have friends, and feel safe and comfortable where I live. It's now my job to keep going forward and to live my own life as well as possible. Fortunately, I have this passion of sewing and quilting that always gives me pleasure. "One Day at a Time" . Even as a widow, I don't plan to disappear into dark places or sadness. Yes, I have my moments, but I also have my job to do, that is to continue to live a good life. Thank you all for comments or personal notes. All are appreciated.Tuesday, September 01, 2020
Lotsa Pink Strips, almost threw it out!
This one, shown previously, was a candidate for the trash basket - I was so disgusted. It had called to me "make straight, walking foot lines". Sounded good so I started straight machine quilting lines at the same angle as the triangles. One line looked lonesome, so I added a second straight line. The straight lines looked kinda overly structured, so I started curving them over each other. Elaine, just quilt some more ... uh oh, those curving, overlapping double lines now crossed over the triangle lines....., oh Elaine just quilt some more, and, and, ad nauseum, until half was quilted, UGLIEST THING YOU EVER SAW! OK, have some caffeine, put your feet up, turn on TV, and start pulling out the stitches. Yes, 3-4 days of removing them, keeping a few here and there to maintain where the pins were at one time.
Successful quilting design was a curling single line of loops and/or hearts/leaves, all wide open. The earlier straight sticthes left a LOT of ugly lines in the quilt, but I spritzed them and shook the quilt, more spritzing, more shaking and in the end, it's good!
I finished the binding with machine stitching on the front between the pinkbinding and the white faux pink/white striped fabric. Stitches are well hidden.

I needed a few more inches on the width. It's busy enough to hide machine quilting stitches.

Saturday, August 22, 2020
Pineapple Pillow
My fingers have been itchin' to make Pineapple blocks. This time I'm stopping with just FOUR blocks for a 16 in pillow. Maybe this small project will relieve the itch! My goal was to use subtle values, and NOT white for background. I was amazed at what that orchidish fabric did for the foresty colors. ( I have to tilt my screen to see the colors more accurately.)

Monday, August 17, 2020
Kindnesses, and another kid quilt
Firstly, a HUGE Thank you to Candace of https://wraggedypatches.blogspot.com/ for her friendship and a beautiful gift that arrived today. She is a very gifted sewist as well as quilter and I am deeply grateful for her kindness.
Today, I finished this little girl quilt. I was inspired by a YouTube video from Krista Moser. I've been quilting many years but sometimes SOMETHING strikes your fancy, and her projects did just that. She's bright and fresh, and presents an excellent and well-presented video. The projects that I lean toward lately, are 60 degree wedges and voila, that's what she's doing in amazing new colorways.
My first idea was getting waaaaay too large, like I frequently do, but this time I stopped and took out 2 triangles of strips and 2 plain whites in each row - MUCH better.

Below is the "getting too large" version Seems like the white has taken over. While I dreaded removing and unsewing, I almost have enough left for a second quilt. Both these quilts were sewn in rows across, not diagonally. No problem at all. Seams of the block-to-block were pressed open.

Tuesday, August 04, 2020
Kids Prints, I Spy
Many of these cute prints were sent to me by a blogging friend, (thank you Joan, of www.shelbystitcher) with my promise that I'd get the fabric made up into kids quilts. So far, so good.

I was particularly interested in the setting and sashing of this design. The quilt made up larger than expected (like always?). It's 60 x 70". Good for toddler, perfect for an "I Spy". There are a few duplicates. My favorite block is a little dark haired girl with glasses - so cute!!!

I needed a little more width to the backing. Those are little spools on the back.

Saturday, August 01, 2020
Proof - REAL Crumbs!
A friend joked that my recent Crumb fabric was probably just freshly cut up fabric so it LOOKED like crumbs but (friendly scarcasm) probably wasn't really from the trash basket. So I pulled out all the blocks I made several weeks ago and laid them next to the most recent crumb block WELCOME banner. See? There are all the fabrics - I told you so!
I used spray basting to sandich the banner and had planned to hand quilt it. However, my needle refused to cooperate, I am guessing it's because of the spray basting product. Makes sense - it's sticky. So I finished the banner with machine quilting. You almost have to study the busy letters to determine what it says!

New projects: Over the last few days I have repainted the upstairs bath, washed everything that sat still, washed and rehung blinds, washed and painted cabinets, front and back, planned new valance over window, spackled in shower area, dragged in the big step ladder and washed walls and painted high cabinets. This unexpected burst of energy is totally foreign to me, but I'll take it, as long as it lasts! I called a friend before attacking the high wall washing, just in case of disaster!
Thursday, July 30, 2020
QAYG, and 6 months as a widow
I showed this toddler-aged QAYG, before completion. I'm pleased with how it turned out. The wide light figured fabric is all little colored tractors. Oh, that is... tractors like they USED to look . Seems that NOTHING is the same as it used to be.

Here is the back - I had a bunch of colored quarter yards, and could cut 4 backings from each cut, with a little left over for the current crumb blocks. This QAYG was the most successful I've ever done, with almost ALL of the stitching in the back sewed in exactly the right place ON the sashing strip, not ON and OFF the sashing strip. Practice, practice, practice!

Being a widow: I lived thru the 6 month anniversary of my husband's death by staying busy. Those months went by so fast - unbelievably fast! What a conflict I find myself. I MUST be at peace with his death and his terminal illness, but heartbroken he is not here. He left me a beautiful gift -- his very last words to me were loving and beautiful - I cannot ask for more.
Monday, July 27, 2020
Crumb Blocks
These are 4 big blocks/panels, each approx 10 x 12 in. Pieces were all pulled quickly from my "trash", and sewed together with little plan nor thought. I DID straighten out edges as needed, and pressed as I went. Most pieces are from a recent quilt, still in process. Some pieces were left larger than others, part of my plan. Hopefully I'll get this project made up soon.
These crumb blocks took 1 hr. and 20 minutes. Great fun, do give it a try. The floor is a mess.


REFUND APPROVED
In preparation for calling the IRS today, probably having to wait for long times, about my delayed Tax refund, I had handwork ready, some reading, and plans to clean out one kitchen drawer. I dreaded it but ... a person has to persevere! I thought I'd contact the IRS.gov site, one more time, to be sure I had the latest info and A CHANGE HAS BEEN MADE!!!! After almost 6 mos. of "being reviewed" it said "REFUND APPROVED" - I don't know what happened but I'm a happy camper and it "will be deposited "in the next day or so, electronically.
I stopped at the friendly H & R Block to let them know, and he said this is a similar story from many of their clients. Do I dare start a similar gripe about waiting for a stimulus check ?
Back to my quilting - photo due soon. Thanks very much for all good suggestions.
I stopped at the friendly H & R Block to let them know, and he said this is a similar story from many of their clients. Do I dare start a similar gripe about waiting for a stimulus check ?
Back to my quilting - photo due soon. Thanks very much for all good suggestions.
Tuesday, July 21, 2020
NQR: Where is my tax refund?
NQR I filed my Federal and State taxes thru H & R Feb. 28, 2020, and received an e-mail indicating they had accepted my forms. My State refund was returned within 2 weeks. I am still waiting for my Federal Tax refund. I am still waiting for a Stimulus Check. My bank info is already in their files, altho I sent it again with my tax forms. I've checked the appropriate Internet site for information, but it's said the same for months. ..."being processed". Calls to the suggested phone number were a waste of time.
Comments anyone, or constructive suggestions?
Comments anyone, or constructive suggestions?
Wednesday, July 15, 2020
QAYG, Boys Quilt, and Guild Raffle Quilt
Quilts are getting MADE during this "staying at home" business. I'm using the "twin strips" method for this QAYG, a small boy's quilt - my blue fabrics lean towards "nautical", but that word is seldom heard of in western Nebraska, so I bought one yard of this cute TRACTOR print, the only fabric purchased. I made 4 blocks at a time, and that also used adequate but unloved FQs for the back. Backing and batting were cut 8 in. and the block finishes at 7.5. Setting is 6 x 8 blocks, a good size for toddler. I'll start the sashing units tomorrow. My method of hiding stitches in the ditch is improving with each quilt.


Tuesday, June 23, 2020
WELCOME banner

Thursday, June 18, 2020
Renovations, and Crumby Blocks
I am moving forward with much-needed small bathroom renovations. Best part is new shower, this time with beautiful Onyx walls and same material for counter top. The shower is in a corner, not huge, but serviceable. Yeahhhh, no longer looking like a cave. I'm just featuring "the mess". If you've done construction or remodeling, you know.


I ignored the necessary mess and changed direction, and tried making crumb blocks, taking throwaways from my trash basket. Yes, it IS great fun! I kept it geometric and stayed with the pink purples, turquoise, light greens, and then I added the black with polka dots to spark it up a bit. Didn't quite know what to do with the blocks when I was finished, but made 3 or 4 blocks, each about 9 x 12 in., then decided to make some letters and fuse them onto a WELCOME banner. So far, so good! That FUSING always ends up conFUSING me, as well as occasionally reversing letters, but it ended up OK.


Monday, June 15, 2020
A ROCK
Folks in my town are "finding" small rocks here and there, some painted, some decorated, some with words, etc., not sure how it started, but I found one at the Dr., another at H & R Block, just setting on a table. The finder may keep, pass along, take home or whatever. It kinda means "I'm thinking of you, whoever you are."

So today, I opened the door and saw "someone" running back to her car and off she drove. I was pretty sure I recognized her. I had run into her weeks ago, unexpectedly, and she hadn't known about my husband's death, but I had told her about his dear note to me, "Make Every Day Count" and ever present dorky Smiley Face. I looked around the front porch and this is what I found, now on the counter, next to DH's note.

Thursday, June 11, 2020
One Step At a Time
This is a current project - bargello method of construction, and little bugs and fireflies are on/in the fabric. Top only, so far. The checks are on the top and bottom - photo was turned wrong way.


Friday, May 22, 2020
Quilt As You Go, in PINK, and a Hole in the Wall

I had a LOT of pink strips, and a lot of extra batting, and some pinkish FQs. What are ya gonna do? No quilt name yet, but I know where it's going. This method might not be for everyone, but I sure had fun! I learned how to get that backing sashing strip close to perfect, by heavy pinning, and then stitching in the ditch from the front, and slowly pulling out the pins as I sewed. I'm happy with the result.

New subject, below: Plumber was needed, drain had been running slowly for months and I knew there was more then just a clog - something also wasn't correct about the pipe angle. Mr. Plumber started with his snake, and then I heard, "Uh oh - that's not good"! Yes, the snake itself broke in the pipes and was hopelessly stuck.

There was no alternative except this decision, in the adjoining wall, yes, the wall in my new, clean, freshly painted Sewing Studio. NO drywall guy is going to do this job, because you do a little at a time, let dry, a little more another time, let dry, etc. So, I went to YouTube, and I think I can do it myself! May take me a while but I'm game. Worst part it that it's low on the wall Best part is my drain is working perfectly, first time in many years.
Tuesday, May 19, 2020
Blessings, and QAYG
This unexpected blessing showed up at my door today, from dear members of my husband's family. Looks like I need to balance them a little.

I've been working on a little girl's pink QAYG. In the past, I disliked finishing the sashing seam on the front, leaving forever stitches but recently learned a better method from Marti Machell. Her sashing is finished on the front and with careful measuring and a lot of pinning on the back, and sewing in the ditch from the front, a pretty neat stitching line is the result on the back. In this case a busy sashing and backing helps even better. I know, you can't see anything. There IS one visable vertical seam on that middle sashing.


Subscribe to:
Posts (Atom)