Here's the entire top, finished.
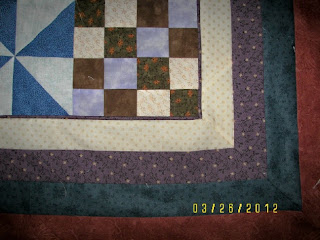
...and here are photos of 2 of the problem corners, where I needed patience getting a nice inner corner. I learned my lesson. Next time I will add the piping to the quilt TOP and criss-cross the corners, possibly pulling out a bit of the cording. But I was stubborn and didn't know, and sewed the Piping to the border strip. Since those stripes really HAD to be mitered. I caused myself complications with the piping.
Despite the problems, they turned out not-too-badly! The piping kinda turned into itself -- I'm not re-doing it.


If those corners are as bad as it was, this is a success! What a nice finishing touch to the quilt.
ReplyDeleteI love this design and I'm going to make it--someday!!
You did great! Have fun with the quilting - a fun part of the process, eh?!
ReplyDeleteGlad I could help. Can't wait to see it all quilted and bound. Nice colors and pretty design. YOu done good!
You got it done and learned something in the process. Not bad at all.
ReplyDeleteI think your quilt looks spectacular..what a nice touch!! Just pops your quilt up a notch! Now when the compliments start flying in (and they will!!) just say THANK YOU!!
ReplyDeleteTake care!
P
Good job, Elaine! It looks wonderful! I admire the way you tackled the learning curve on this project.
ReplyDeleteLove the way your blocks look three dimensional
ReplyDeleteBeautiful quilt, and I think your corners look just fine! If it makes you feel any better, I think I would have done it the same way. (I probably wouldn't have been happy about it either.) Thanks for sharing your learning process. I'll try to remember that tip!
ReplyDelete