Showing posts with label Scrappy Rebuilt Log Cabin. Show all posts

Thursday, November 05, 2009

Another Rebuilt Log Cabin, and a Fairy Quilt

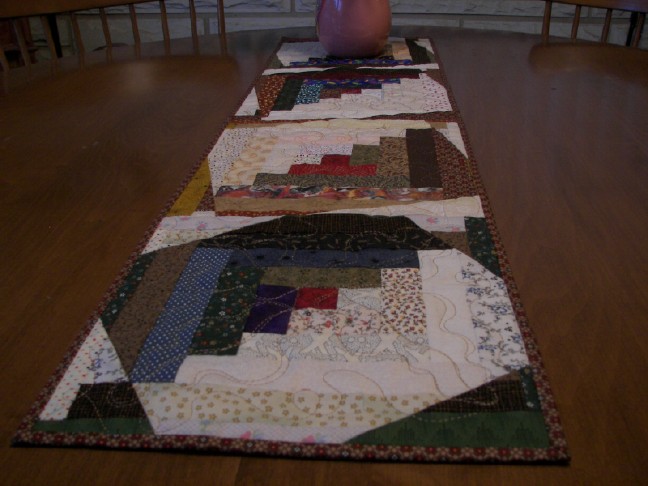
This is one of my next projects, (72 x 92 inches), a scrappy top several years old -- it's time for quilting! Are ya gasping at that quirky border? Look how the border meets at each center - each in a different way! I love it's oddness and can't wait to get it quilted.

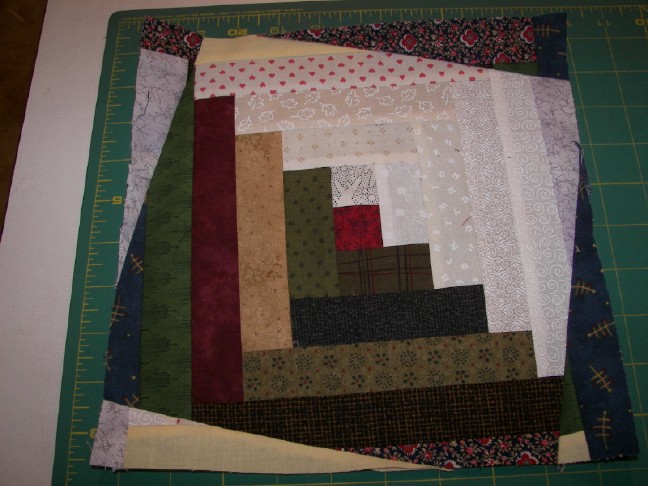
While this border is a bit - uhhhh, odd with this quilt, it really is one great border. Look how it can fit around the corners if you plan it right. This border is 8 inches wide, but I'm sure the quirky log cabin blocks are larger. If you are wanting to expand your plain borders into a pieced border, this may be a useful pattern. I have dark values as the HSTs, and medium values are the diagonal squares. And wouldn't the border blocks by themself make one great quilt? This pattern is called Jewel Box, and has other names (Buckeye Beauty?) but it's an easy peasy pattern using 2 inch squares and 4 inch HSTs (finished).
Meggie, a 3 year-old niece wants a "Fairy Quilt" ... despite stern instructions to myself, "DO NOT BUY MORE FABRIC", I could NOT resist the Keepsake Catalog featuring several versions of fairy fabric. Oh my, it was delivered today and it's gorgeous! The wings are all silvery, and just demand some metallic quilt thread! I'm not decided on the pattern but am tempted to make yet another Kaleidoscope Quilt, this time all soft and fluffy, a place where fairies would live. I planned the fairy fabric for the back! I even HAVE fairy fabric that I had planned to use but like we frequently do, needed MORE!

My projects are backing up ....

Sunday, October 01, 2006

Rebuilt Log Cabin DONE, with Bonus Table Runner


My Rebuilt Log Cabin is DONE! Yeah -- I think it turned out just fine, considering it truly was a scap quilt. And I didn't purchase one piece (...uhhh... recently) for the project. I machine quilted it, on a year- old Janome Memory Craft 6500, on which I had never machine quilted, and I am very pleased with the evenness it stitched, (no stitch regulator other than my own hands). I used a regular sewing machine thread (a fine Metrosene) in the bobbin, and randomly chose 2 different heavier threads for the top, that sorta matched. Brown was too obvious so I ended up with a gray. The light you see on the closeup shot of the block is not thread, it's reflection. I used a light on the diagonal light areas, and dark, on the diagonal dark areas. (duhhh!) I had 4 blocks that were trimmed wrong (tilted to the left) so I made them into a bonus table runner. This pattern and colors blend well with wood and antiques in my house.

I must tell a short story about the techie who installed my new DSL Line. Almost always, I have a quilt on my living room floor, in one stage or another. I try to watch who visits, because sometimes it must be invisible - there has been more than one man who walked right over it, so I now watch carefully. This techie came to the door, and walked carefully around the quilt, and turned to me and said, "Hey, that might look good with Prairie Points!" Wow, I loved him! He knew all about quilts, the lingo, etc. When he turned on the computer, this Blog page is my home page, and he even took the time to look at the quilts! I love him. Wish I knew his mom so I could tell her what a good 'boy' she raised. A good day.

Tuesday, September 12, 2006

Rebuilt Log Cabin


(Well, they are in the wrong order, but you get my drift! I gotta learn the right way! )

I attacked my scraps of 1 ½ in. strips last weekend - this time I used my left foot on the 'gas' and my right knee on my presser foot lifter, and gals, that technique definitely increased efficiency and speed! The result was this traditional log cabin layout (middle photo) , and I DID use a good deal of my scraps -- TRUE scraps, not just FQs cut up to make scraps. I made 4 rounds. Mmmmm .. it’s pretty comfy/cozy, and there’s not a thing wrong with it, but somehow, it just didn’t make my heart go pitter-patter.

Well, I added one more round, and started wacking it – I chopped off corners and resewed them to opposite sides, then trimmed to a consistent size. Well, I had a few problems, but ... there’s the end result (top photo). I’m pleased! This is the second time I’ve used this technique, and like anything, you learn some do’s and some don’t’s along the way. I will probably trim off some of the piano key border. If some of you need better directions, I’ll write something up. If you start on your own, make a few extra for practice.

I'll machine-quilt this myself. I keep practicing on my regular machine.

I saw this pattern for about 3 seconds on TV, Fons and Porter when Marilyn Badger was demonstrating long-arm quilting – she wasn’t featuring the quilt at all. That glimpse electrified me – I just HAD to make it. Well, she kindly sent me the basics very soon, and at the same time, I opened up one of the ‘bring one-take one” magazines we have a Guild, and miraculously, there was the quilt with complete instructions, by Katie Pasquini. Hers was mighty fine!