Showing posts with label string quilts. Show all posts

Monday, May 21, 2018

C-130 overhead, and Caribbean Strings Progress

I'm not sure why we were visited by this C-130, and the close flyover - perhaps because this town used to have a huge airbase during/after WWII.  There are still veterans  or families of veterans at the nursing homes, and the plane went right over their residence.  I just stood next to the road and took the photo - it went around twice.  Lots of folks were out in lawns, parking lots, fields on this beautiful day.   


This is my progress on Caribbean Strings.  From center to what appears to be the top is 5 rows and there is yet another row beyond this top, still not figured out, but using dark strings .... I think.   I am leaning towards a Hidden Wells design but ....  That last dark row/border will make it 10 x 12 blocks finished, about 86 x 100 something.  This is too large for my DSM quilting, so I'll break it into sections.  All these blocks have paper on the back for now.  I definitely used up a lot of leftover strings and strips.  The center white strip was consistent in size, but the others were not. 

Tuesday, June 09, 2009

Using Strings

Wow - thanks for all your kind comments on my Log Cabin - it's nice to be noticed. 8-))

This string project (below) was done in 2 days of sewing. OK, the strings were already available, and I had cut the telephone book pages a few days ago, on a paper cutter at my office. The rest of this project will be somewhat fiddly, but I'm off to a good start on another project. Oh yeah, I haven't spent a nickel!

These were strips (above) and pieces left over from a "Strips that Sizzle" project - much too good NOT to use -- they don't look like much - but, have faith.

I sewed them onto telephone pages which were cut at 5 3/4 x 11. Using the pages gives them some stability, and what I like best is that I don't have to measure anything at this point. I simply slap another strip down on the paper, and while it's still in the machine, and roughly cut off the strip. I sew through all 40 pages, press the strips open, then put two more strips on, press until the page is full. Finger pressing does not work well.

See? trimmed up (above) they are starting to look like something.

Then I sew twosies, foursies, etc., until all the pieces are one long roll. Sometimes paper falls off, but it's OK at this point. Then I press the seam open where I sewed the pages together.


Voila! A roll of fabric.

And this is where I'm heading (below). I used 40 pages, and each is about 11 inches long, so I have 440 inches of fabric which will make half of a Half Square. I'll probably pair it with white, and aim for a 6 1/2 inch half square. Layout? not sure. I'm thinking OK 440 inches divided by 8.48 inches (diagonal of block) = 51, but by turning the triangle back and forth that is over 103. Hey, is that right? If so, I have MUCH MORE than I need! I always forget the measurement is on one side, but one turns the triangle the other way and gets another block cut!
I haven't decided when to remove the paper yet. I may not get to working on this project for several weeks.

Sunday, October 28, 2007

I wish THESE were MY creations!


A gal named Linda, from Ontario, Canada, not yet a blogger, sent these photos to me. What a gift for me, to open my mail and see this in my mailbox!!! I am honored and thrilled to have received her permission to post her photos here. Also, look how clever her borders are, where I presume she had seams, yet the method she used to artistically hide seams is wonderful! Her paragraph below refers mostly to the blue "Fishez" project, but she sent me other quilt photos as well.

"I just sent my pictures to you to let you know how much your beautiful blue string inspired me and, then, lifted a burden of how to use my "fishez" from Stargazey. I fell in love with this "fishez" pattern, but went overboard with the mixing of the blue background fabrics. They just did not work as an entire quilt top so I put them aside to live in a plastic bin for a while...........the very first time I saw your amazing blue string I thought water........fish/water......maybe they could work. And, if you will notice, I tried to copy closely your wonderful blue strings with the reds and greens since I felt they were like the deep/shallow, warm/cool areas you can feel in a lake..........

My name is Linda. I live in Southern Ontario, Canada. I am a blog surfer and have been very inspired by string quilts. I am limited by the number I can finish since I hand quilt....... finding out about "all over fan" quilting has made work so much easier.

I am not concerned at all if you include my pictures-----credit or none. I have a life goal to make a quilt for each of my four married children and their spouses plus my husband! Two down. This fish and strings will be number 3. That will keep me busy for a few years!

I had a dream to make a quilt for a fund raiser and thought I could quickly manage a string. The dark was my first. Then I made the two pink ones. We had two girls staying with us for 6 weeks from the Chernobyl region of Belarus for a health rest.........from the effects of the nuclear meltdown in the 80's. It is suggested the land is still very contaminated. I wanted to make them each a quilt. I am an impatient quilter who gets bored easily, so strings suit my style these days. I have been totally inspired by you, Bonnie and Mary and the possibilities that strings hold out for colour experiments.

Thank you Elaine for your sharing of your work which has allowed me to grow in my hobby............ Linda"

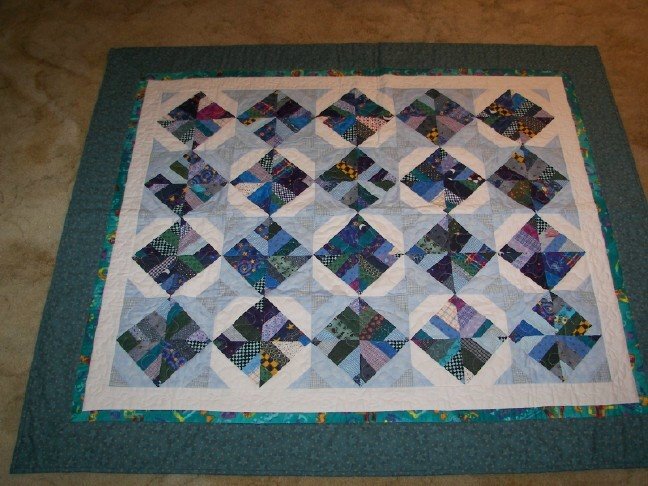
This last photo is my own original blue string quilt, (donation) that many of you have seen before. THIS PARTICULAR CORRESPONDENCE, ENTHUSIASM, ENERGY, AND INSPIRATION IS CLEARLY WHAT I HOPE TO ACHIEVE WITH MY BLOG. I dearly love the creative and frugal process of using humble strings, and especially LOVE the excitement and thrill when they morph into something unexpected AND beautiful.

Sunday, November 19, 2006

Found more inspiration looking at my own blog!

Oh m'gosh - I am looking at my own post, and a new pattern has appeared in my imagination!

See all those string quilts? What would happen if at the corners/ends of each string pieced unit, you just put a background square? Then the strings would show up and appear to be floating. I was looking at the turquoise and yellow one - I no longer have the original and cannot remember what how the corners are constructed, but it looks like I left it light - same as the background. Hey, that's another opportunity!

Mercy, maybe someone will get that done before I get to it! If so, send me a photo. I'd love to see how THAT would turn out. And scappy, to boot!

String Quilts - My favorites

ALL of these string idea quilts are because I was inspired by Bonnie Hunter at www.quiltville.com. She calls it something like String-X if you need directions. I even had her web page or blog as my home page for a time, because of her daily inspiration. Thanks, Bonnie.

My first try is D2R2 - an abbreviation for Dumpster Twice, Retrieved Twice! I did not have faith, and didn’t finish it with borders. I kept it for several years, and dumped it twice, when cleaning out drawers., then felt guilty, and retrieved it from the dumpster. Finally, not too long ago, I was asked to do a Trunk Show. I am a believer that we should show our ‘failures’ and well as our successes, so once more, I dragged it out and forced myself to add borders, and machine quilt it. Was I ever surprised that it turned out .. ‘not too bad’! Certainly it is not a heritage quilt, but it DOES make a great stash buster, and it is a reminder to myself, that just because it’s not perfect, does not mean it’s not OK.

Strings - baby quilt: Yellow and turquoise scraps. Who did I give this to?

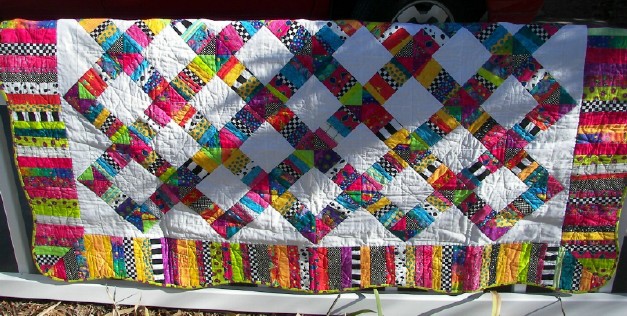
Brights – wow! I made this from scraps from an earlier post - the Wonky Flying Geese with Neon green background. This is a lot livelier in person. It's been folded up in the closet for a while, hence the wrinkley appearance.

Strings - cozy brown/reds. I call this one that belongs to my DH, “His Girls” because the backing is all Pin-up Girls in provocative/lovely outdoorsy cabin-y type settings – those gals are pretty racey - !

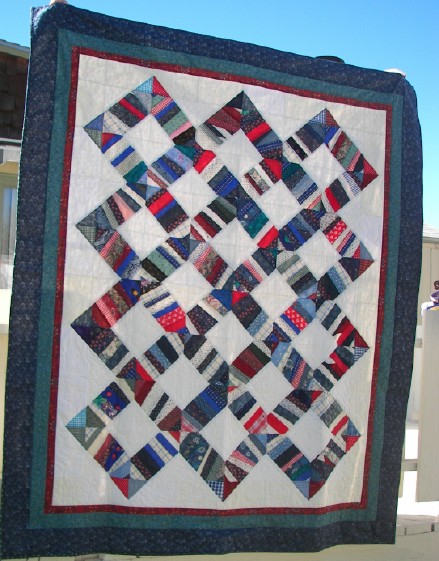
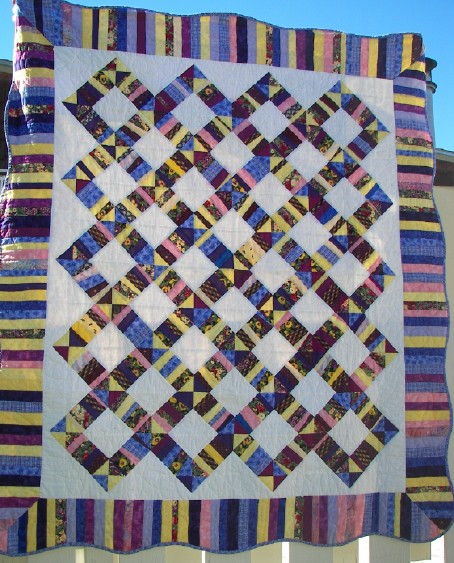
Strings - purples and yellows. I had a lot of them and wanted to use them up.

I made one alteration from the original, on most of them. I felt the triangle at the end of each diagonal path needed to be added. The first one has a quick corner added to each side of a light strip, joined together, to make a point. That got a bit tedious. I wanted the triangle to 'float' on the light background, so I came up with the idea of using one long light piece for background on each of the four sides. Then, at the end of each outside pathway, take 2 triangles, sew them together along the short side to make a larger triangle. Face them with fusible lightweight interfacing, using a tight stitch, leaving the longer side (bottom) open. Turn it right side out, finger press, then insert that into the seam, between the background and the diagonal string, matching seams carefully, and sew. It really simplified making the point. Then when they are all sewn into the seam in the correct position, fuse/press it down. I later used invisible thread to do a tiny blanket stitch -- totally invisible.

I definitely learned that even though they are scrap, I should use SOME discretion when putting them together for a scrappy quilt.

All of these quilts were sewn onto a foundation, mostly telephone book pages. Several of them have been hand quilted, as well as stitch in the ditch in the long straight seams. They are not masterpieces, but intended to be used, and I love them all.

Friday, August 11, 2006

String Quilts - aka Telephone Book Quilts


I have always admired string quilts and wanted to make them. After a few false starts, using every scrap imaginable, I was disappointed that they didn’t exactly cut the mustard. It was the part about “using every scrap imaginable” that resulted in “didn’t exactly cut the mustard.”

My trash basket under my sewing machine is large – and I don’t empty it frequently, because ... well, you know, I might find a use for some of those scraps. Well, I DO use them. Digging through that basket is like an archeological dig - I find good things! And this is where I found many of the scraps for these 2 quilts.

After seeing Bonnie’s wonderful example at www.quiltville.com, I was inspired to try again. My first experiment was the pink quilt. I used an outdated telephone book as a foundation, trimmed the pages to about 4 inches wide (pick a size, any size!) x 9 inches (the size of the page) – and just started sewing down cute, pink scraps and any other childish scraps that sorta looked good. I pressed the strips down neatly as I went along - maybe after sewing down one strip on 20-30 pages. I can’t remember how many pages I used, but I remember sewing the pages together, end to end, and walking from one end of the house to the other, with the long strip encircling the entire house. I then neatly trimmed the edges to an exact 4 in. size. I faced it with a 4 inch (or whatever size you started with) strip of white, sewed down both sides, then layed my right angled ruler (Companion Angle) along the edge, with the blunt point of the ruler on one edge and started cutting triangles the width of your strip. You may have to unsew a few stitches after each slice. When you open it up, you will have a pretty good square. I pressed open at this point, and re-trimmed to exactly one size to assure accuracy. The edges are bias - be gentle.

I removed the paper after attaching the sashing. This paper removed easily. Don’t turn the fan on at the same time you’re engrossed with removing the paper! This project was a great idea for using up scraps, at a minimal cost, but it DID take time.

I was so thrilled with the result, I did the Turquoise Quilt, aka as Area Code 308. (I live in area code 308 – it was entertaining to read the names of acquaintances as I removed the paper foundation!) Same technique, but this time, half the strips were faced with white and half were faced with blue. I thought the plain white/blue pieces were a little large, so I sewed quick corners (2 different colors) on them, resulting in a whole new pattern. You can hardly tell it’s the same technique. Again, time was spent making this quilt, but not much money, and I used up a good selection of scraps.

There is no end of patterns you can make with this technique. After all, you are making half-square triangles. Try it once and you may be hooked.

I have one more, for the next time. In the meantime, I'm going to figure how to load photos in the right order!

Peace,
Elaine Adair