Showing posts with label pineapple. Show all posts

Tuesday, July 14, 2026

A good day at the Guild Quilt Show


I've posted this Pineapple (Zippity Blue Dah)  previously -  won a First Place - I'm happy!  Note there are 2 separate blocks, altho the only difference is in value placement.

This QOValor has also been previously posted - won a Second Place - I'm happy!  I used bits of my deceased husband's shirt in this quilt.  I had also MADE that shirt, and cutting it up was not as emotionally easy as I had heard.  The recipient is someone my DH appreciated, so that will help.  


Friday, October 17, 2025

Zippity Blue Da, Pineapple


When your entire collection of fabrics seem to be ALL scraps and pieces, this is a perfect solution of what can be used.  Once again, I used a ruler and suggestion from Gyleen Fitzgerald, because it's smaller than the Creative Grid version.  I think next time, I'll try the larger one, just to note any difference.  This is 7 x 8 blocks, 8 inch blocks with a 6 inch border., about 68 x 76 in.  Note the difference made by the alternate block, with a slightly different value placement.  This is my 6th or 7th Pineapple quilt. 

Freeze warnings for tomorrow night - electric blanket installation time!  


Saturday, August 24, 2024

Pineapple in Purple, for REAL, this time - no more complaints, for now

 Computer is home from it's hospital stay - the Photo App had disappeared - how could that have happened?   Plus a few other issues from ME trying to fix things, making a bigger mess.   8-(    It seems that every year, I have to take it for some kind of R & R at the local computer hospital, and get "something" fixed.  Computer physicians are very kind and diplomatic and never say things like "operator error".  


Yes, another Pineapple, Scrappy, and mostly in shades of purple.  Center quilting design was a series of paisleys (I quilt on my DSM).  Just cannot resist Pineapple Quilts, especially when we end up with so many strips.  The binding was completed by machine, with a flange.  One problem is that I had the entire border all nicely quilted with a nice meander and even after one side, I had begun to doubt that decision.  Guess I was on GO and didn't stop until it was DONE -- and it looked terrible!  The quilting itself was quite decent - it just was NOT a good choice  in that border so I removed it all and redid with some simple straight lines -- so much better and simpler.  

Quilt Guld restarts in a few weeks after summer vacation.  This year I'm giving a Trunk Show and also teaching a workshop on the Kaleidoscope ideas.   It's always lovely to get back to that routine. 

Sunday, October 25, 2020

Green, Green Fields of Home ... ???

 No green in this yard, due to heavy snow today!  But I do have fond memories of  early life on a small  farm in Illinois.  The early green alfalfa fields were a favorite, and especially,  those pink/lavendar blossoms.

Here is my latest project - another "Pineapple, Green, Green Fields of Home"- I seem to be obsessed with them.  I've used a lot of greens in the blocks -- notice there are 2 different block layouts, similar to 2 or 3 I've made previously.  All the blocks are made with different fabrics, all scrappy, with the same light, slubby muslin.  There are a few "odd" blue and/or gold blocks.  Calculations on the inner border were successful, first time around, thanks to Gyleen X. Fitzgerald. I purchased her DVD from Annie's Craft, "Learn to Quilt With Scraps: Stash to Treasure".

. 


The back - I needed another quarter yard - had to improvise.

Stay healthy everyone!  Thank you Mom, for helping me learn to sew!

Saturday, September 05, 2020

Pineapple, "Green, Green Fields of Home"


This is my 5th ??? Pineapple Quilt /blocks I've made - there is just something about them I find appealing. They are perfect for scraps, of which I have many.  I absolutely love watching a DVD from Gyleen X Fitzgerald  whose design this is.  I purchased her DVD from the original Craftsy,  or was it Annies Crafts ?? AND her ruler.  There are other designs on the DVD but I'm stuck on this one, she calls it Hugs and Kisses.  Her delivery is peaceful, unstressful - a very pleasant project.  There are 2 different blocks for this version.  Note the "O" in the left block and the more symetrical coloration in the right.  The blocks on the right are each individual, in various color combos, but all with the same off-white light.  I've used greens, browns, lavendars and  harvest colors, all which remind me of my fortunate childhood on a small farm in Illinois.  

New subject:  

Some of you are have asked how things are in my quiet home, following the passing of my dear husband.  I'm doing well as expected and am very aware of my many blessings.  There is a season for everything - he always said "Make Every Day Count" and I'm doing my best.  I am eternally grateful for our years together, and now for my friendships, here in blogland, and in my "real life".  8-))  I am well and healthy, have friends, and feel safe and comfortable where I live.  It's now my job to keep going forward and to live my own life as well as possible.  Fortunately, I have this passion of sewing and quilting that always gives me pleasure.  "One Day at a Time" .  Even as a widow, I don't plan to disappear into dark places or sadness.   Yes, I have my moments, but I also have my job to do, that is to continue to live a good life.  Thank you all for comments or personal notes.  All are appreciated.


Monday, June 17, 2019

5th Quilt from Box of Scraps


DONE!  Yes, I'm still finishing that "box of scraps".  Our Guild is preparing for our Quilt Show and suddenly we needed a few more quilts.  This was close to completed, so I got off my you-know-what and finished it in several hours.  (Why do we wait so long?)  


It's not large, and looks a lot like a previous quilt.  This one is about 53" x 63".  I deliberately chose that busy backing.    


This project taught me about using a formula for cutting variable width floating borders.  Thank you Gyleen Fitzgerald!

I also learned (second effort) about making a faux flange.  My strips were 1 5/8 and 1 3/8 in., narrower than most of the instructions and next time I'll reduce them more, to 1 1/2 in. and 1 1/4 inches.  The binding is sewn to the back, then machine stitched to the front.  

If this is new to you, hints.  Be very neat and precise.  Quilt the top all the way to the edge, then trim exactly.  Be exact with those binding strips and don't stretch them when pressing.  When sewing down the binding,  I wanted to use my regular quarter inch foot as it's more precise than my walking foot - that is why I quilted to the edge and chose very narrow strips.  The last seam is on the front, with Smoke, invisible thread, very slowly and carefully.  Those stitches on front are extremely difficult to see.  Yeahhhhh!  


The busy backing was intentional because despite precision efforts, stitches were going to show where I didn't want them.  It's OK and it's DONE!

I have 4 quilts in the show, with no expectations for ribbons but ya always hope, don't ya?  Putting quilts in the Quilt Show takes effort, doesn't it?  Our show is local, with ribbons awarded by visitor ballots. 

Tuesday, May 14, 2019

Scrap Quilt #5, Pineapple with Floating Borders

I redid the corners.  While all ended correctly, I DID have to futz and fiddle those squares on point, unsewing numerous seams and scanting them up on top and bottom.  Finally, I am near the "bottom of the barrel" from the original box of scraps, and I had to purchase the green border squares on point fabric.


This is an example of a floating border (if you have never floundered through calculations) .  I.e., you have the quilt center DONE and you have the pieced BORDERs done and now have to figure that inner white border which frequently ends up a different width on top/bottom, different from width on sides.  I followed instructions from Gyleen Fitzgerald, and the FIRST things she says is "put your brain on the shelf and just do what the instructions say".  That is easier said than done!  after I second guessed, third guessed , ..... 12 guessed, and finally rechecked my own WRONG figures,  yes, if I had just followed her instructions, I would have saved a lot of anxiety.  Yes, get pencil/paper, measuring tape and calculator and do what she says!  This is the second floating border I've done using her technique, and it does work.

It needs another plain border, then binding, then DONE.  Notice there are 2 different blocks.

Friday, May 10, 2019

The Dreaded Inner Border Calculations

Here is another of the 6 projects from the gift box of scraps.  It looks a lot like another Pineapple Quilt I already have - probably because the fabrics came from the same LQS, just via different avenues.  Border is next - I had to use my own stash for the green border squares, and have run out but have another close match.   Hey, it IS a scrap quilt.  


I taught a class once about blocks on point and diagonal measurements and the 1.414 multiplication factor, and a couple of the gals asked "why do we need to know that"?  These squares on point is why you need to know that.  I kept the size of the border square same size and value of the block center.  A neighbor's husband was looking at quilt of mine that had a clever border and I heard him say to his wife, "Look what she did!" and ever since then, his kind comment has encouraged me to try a little harder on borders.    

Now I am facing forgetfulness for calculating the size of inner border when one has the center quilt top done and the outer border done, and how does one figure size of inner border(s) between them.   Ya can't jes go chopping off those squares on point, ya know!  The best instruction for me was from Gyleen X. Fitzgerald - but I don't remember them - must dig around my DVDs and relearn it.  She says, "Take out your brain and put it on the shelf, then follow these instructions, and don't think about it."   8-))) 

You can kinda see what the corner SHOULD look like.  The existing white border needs widening or removal. 

Monday, February 25, 2019

BASTING and puckers and pleats, OH MY. Pineapple project will calm my soul!

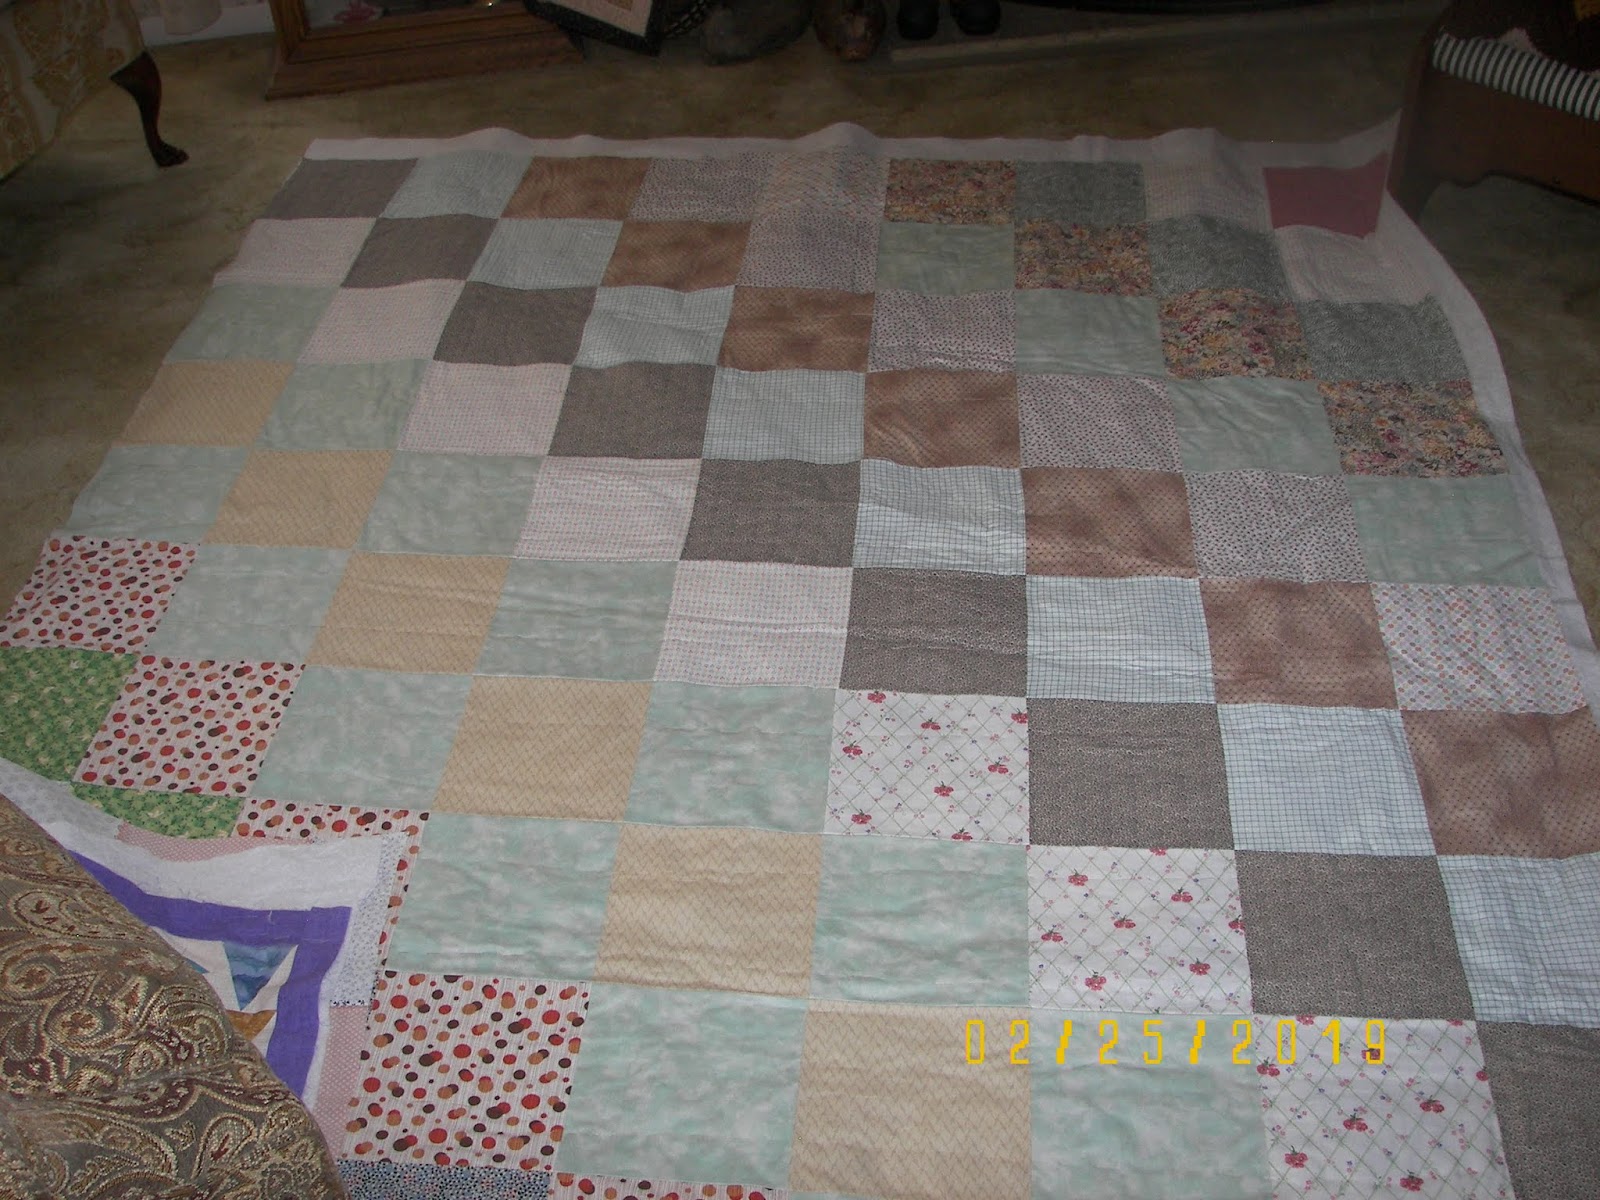
Basting a quilt top is my least favorite job.  I dragged one table from the garage to the house, across the snow -- it's heavier than I remember.  My top and backing are pressed nicely, batting was in the dryer with a damp towel, all is ready for the job.  This time I decided to use basting spray AND pins.  I did everything else just the same as previous jobs but for some reason, by the time I reached the bottom of the quilt, my carefully measured backing is no longer long enough - uh oh, how can that be?? 

Well, when I thought I was finished but short, I took it off the table and turned it over, oh my gosh, not just a few puckers, but now I had pleats!  Careless, ??? not concentrating ????  Disaster!  The top and batting are all OK (flat), sooooo, gathering my patience, taking a deep breath,  I removed all the pins  from the front, laid the mess backing/puckered side up on the table and pulled off the well-stuck basting spray, a little at a time, starting at the top and slowly smooshing out the puckers.  A yardstick stuck between layers helped to unstick a few inches at a time - laborious! Then I found my long needle and thread and thimble, and hand basted it all over again.  No wonder my backing seemed short, I had INCHES of fabric puckered in the back.  LIVE AND LEARN.  Never again will I use both basting spray and pins.  It didn't help when my last thimble dropped to the floor and rolled somewhere under DH's Lazy Boy and found it's forever home wedged within the under structure of the chair.

Ok, basting is done by hand sewing and this was successful.  Here's the back - you see I had already spent a lot of effort making the backing.  Hey, that's 6 yards of stash!

I am hoping to try some ruler work on this Bonnie Hunter inspiration.  BTW, this top front was made from the same "gift of scraps" from my LQS.  There are 5 projects made from that box. 

And here is another project from that box of scraps.  8-)))   I may make an alternate block, ala Hugs and Kisses, Gyleen X. Fitzgerald.  16 regular pineapple blocks made today.  I added the white fabric. 

Friday, May 13, 2016

Pineapple, Photo #3, and Rejected Blocks

 
 I'm getting close to the end of making blocks.  Oh dear - there is my Mom's afghan  in the photo that she made for me about 50 years ago!!!  I haven't changed colors yet! 

A few of the blocks were getting too dark, due to the dark centers of the "O" block so I started using more tans, mustards and rusts.  Then I had a few pinks that didn't seem to go - I took off the too-pink corners and replaced with darker strips, but left a few in, just for orneriness!  Rows are 7 x 9, so I'm getting there.  DH will be happy when the "design floor" is usable again.  I'm guessing I'll border it in something very light, like the blocks.

(Tip: If a person used a light center in the "x" blocks, this entire quilt would be much lighter. )

Below are 4 traditional blocks I started with, trying to figure what I wanted, but that center beige was not attractive with the clear pinks and blues.  The block scrappiness was OK, not what I was planning, so these didn't make the grade.  Sometimes we quilters have to play a while before we figure out what we want.  ( hmmm - I could applique a different color to cover up the beige and work them into a pillow ... ) 

Note - if you have not made this design, be aware that where the corners meet is where you get a LOT of visual design!  The pineapple quilt above ended up with spool-like motifs, due to the alternate "O" block. 
 
 DH dared me to take his photo - he smiled but had recently endured a tooth extraction.  That's the first smile I saw all day.  Better than the swollen cheek he had a few days ago.  He's recovering just fine. 
 

Sunday, April 24, 2016

Chadron Quilt Show

I took photos of my favorites - Below is my friend Carol, with her stunning Pineapple Quilt.  She won 2nd place in her category.  It's in batiks, -- and absolutely beautiful.  Of particular interest is the border which was made of "O" pineapple blocks that originally, were to be included in the center of the quilt.  Carol decided to cut them in quarters and make a border of them.  We are all amazed at how the border turned out!  It undulates around the quilt perfectly, even at the corners! 


This belongs to Lari, another friend - the stars are so warm and cozy, made even better by Carol's (above) quilting.  This is another addition to my stack of future quilts I want to make. 

 The theme of the show was "Diamonds are a Girls Best Friend."  This was a scrap quilt that was unusual -- I LOVED it's unusualness!  Wonderful use of her scraps, and made differently than I've made.


Here's a close-up of the simple block. 


Here is another similar scrappy string quilt  - I LOVE it as well!  The background on this one is pale blue.  It may have been made by the same person - not sure. 


I brought 2 quilts, neither of which deserved attention, but I wanted to add them to the mix.  We never know when a quilt will inspire the next person.  
This was a lovely 3-day show - with demos, Trunk Show, and Vendors.  Chadron is a small college town in the Nebraska Panhandle- they always have a very nice show. 

Thursday, February 04, 2016

"Try it, you might like it!"

Remember when you didn't want to try some new, "suspicious" food, something your mother had just made and you balked at trying it?  And she would say "Try it, you might like it!"    Many quilters avoid a Pineapple because earlier experiences didn't work well, or you used the paper piecing, not always a favorite, or you had issues with the bias, but --- I had NO problems with this project, probably due to the excellent pineapple ruler I used AND the DVD I purchased thru Annies Craft Catalog, by Gyleen Fitzgerald of www.colourfulstitches.com   I tried it and I LIKED it! 


Thursday, January 28, 2016

Pineapple border, machine quilting, and a few little quilts

 
Border possibilities - Piano Key?  uh, nope, I like this one.
 I basted this in the house - it's about 63" x 63" -- sorta do-able on my sewing table.

And this morning ... ta dahhhhh!  I am so excited to begin the machine quilting - my favorite part!!!  I started with a Schmetz 14 quilting needle, but right away, it skipped, so I changed to a Schmetz 14 topstitch and voila.  Happiness!  This is an allover, kinda lighthearted in feeling, center is a swirl with a posy and then an echo around the posy.  This was inspired by Christina Cameli, in her recent MQ book.   LOT of seams, my machine goes thru them.  (Janome MC 6500, no stitch regulator). 


 Here is the top quilting thread - a King Tut variegated.
  
 
Here is the backing I found, on sale - Yeahhhh Pats Creative Stitchery!!!  Back thread is white. 


New subject - these are 2 little quilts I made starting with 9-patches, cutting the 9-patches, and rearranging the pieces.  For whatever reason, I have always LOVED making blocks and then re-cutting them.  They are too small for Linus quilts so I just look at them!  8-))) I call them 9-Patch Puzzle.


Friday, January 22, 2016

A friend saves vintage blocks, and a Pineapple Beginning

What a great way to start the day - aren't they beautiful?  Look at the giant white ones in the middle!   

In mid-November at the Guild give-away table, sat a large stack of vintage blocks.  Kinda sad and not well done but .... I grabbed them, shoved them in my friend Jody's hands and said, "Here make something of these!"  Poor woman - I didn't even give her a chance to object but she's creative, energetic and gets things D O N E !  Hmm, lots of piecing, by hand, not sophisticated, yet beautiful in their humility.   Some lady was using her time wisely, using what she had.  There is even some fussy-cutting. 
 

In mid December, (yes, less than 1 month later) Jody dropped by my house with a big wrapped "something" under her arm with instructions "do not open 'til Christmas" ... well of course I failed that edict.  After she left, I opened it ... and cried with joy. 

Look what she did with the "unloved" blocks!!!  She repaired some, added the inner black sashing, added the dark border purchased when she and I had attended some quilting function together.  She often finishes her quilts with a sliver of color against the binding.  She then washed it all, and those blah, tired-looking blocks turned into something beautiful!!!   Quilters make and give quilts away - we seldom receive a quilt, especially one with meaning.  How lovely  that she gave these blocks a real life.  It's prettier than this photo, and is now my TV-watching lap quilt.


  Above is the backing - perfectly lovely!  Thank you Jody!!!


New project ....

a Pineapple Quilt, using 2 slightly different blocks.  I'm loving it!  This design came with a DVD purchased thru Annie's Catalog/Craft catalog, and the DVD features Gyleen Fitzgerald.  (I LOVE my quilting DVDs!)  Oh My Gosh, I am loving this one!!!  I DID purchase her ruler  (about $14) which I also love.  Each block came out exactly correct, square and true.  (There is another ruler at Annies, but with more lines, options, cost - I chose the simpler version)..

If you have never made a Pineapple block, and are not paper piecing, you really need a ruler made for this technique.  The block is very easily pulled out of square and is trimmed and checked after each round.  These strips are cut at 1.5 inch, and the block finishes at 8 inches.  Also, her technique trims the blocks from the back.     


Wednesday, December 16, 2015

Pineapple scraps, ruler, and siblings

I had a bunch of leftover strips on my sewing desk and also have been hankering to play with my seldom-used Creative Grids Pineapple ruler, so I made this.  It was going FAST!  It came with instructions, (still unread) and there are also several You Tube videos making the block construction  fast, easy and mistake-proof.  Too bad I didn't notice the errors until too late. There is some flipping back and forth, and a person needs to actually READ and understand.  Really?  LOL

OK, effort #2, below.  I unsewed back to the row with the blue/gold checks, and this time was more careful.  The ruler helps with efficiency and keeps it square and true.  I didn't like flipping it back and forth, rechecking each time before cutting, but with practice it would be fool proof and easier.

The strips finish at 1 inch, and the ruler is made  only for one inch finished strips.
Here is the Creative Grids ruler.  It was a little pricey, but these days, many are. 

However, I have found another lady, Gyleen Fitzgerald, who made a lovely pineapple DVD, available from Annies Crafts, or Annies Catalog.  I always enjoy my sewing/quilting DVDs.  She has her own version of a pineapple ruler.   There was also another ruler available from Annies for a higher cost.   

What a great scrap quilt!  If you have not made a Pineapple Quilt, and don't want to use paper piecing, I would strongly suggest a good pineapple ruler to keep it all square and true.  Gyleen also has several other books and DVDs.  She has an appealing soft and gentle easy-going way of speaking and sewing.


Family stuff - Lastly, below is a photo of my siblings taken in October when I enjoyed a delicious drive from western Nebraska, across Iowa, up to Wisconsin.  (Almost 2500 miles by the time I returned home!  Pretty good for this old gal!).  My brothers are both retired Engineers, my OLDER sister is still beautiful!  I had just broken my tooth - note food still in hand.  Notice array of pens in brother on left.  LOL   We all live far from each other, and the fact that we could get together, was an amazing miracle. 

We were blessed with this loveliness recently - no wind, not cold, and we didn't even have to shovel.  8-)))

Wishing you all a Merry Christmas, Happy and safe Holidays.