Showing posts with label Bonnie Hunter. Show all posts

Wednesday, March 03, 2021

Crumbs, TATW, Bargello, Puzzle Done

Pretty amazing what can be done with scraps and crumbs.  Triangles were sewn in the back corners and I inserted a paintstick for a hanging dowel.  I think the recipient liked it.  I LOVE the crookedyness.  


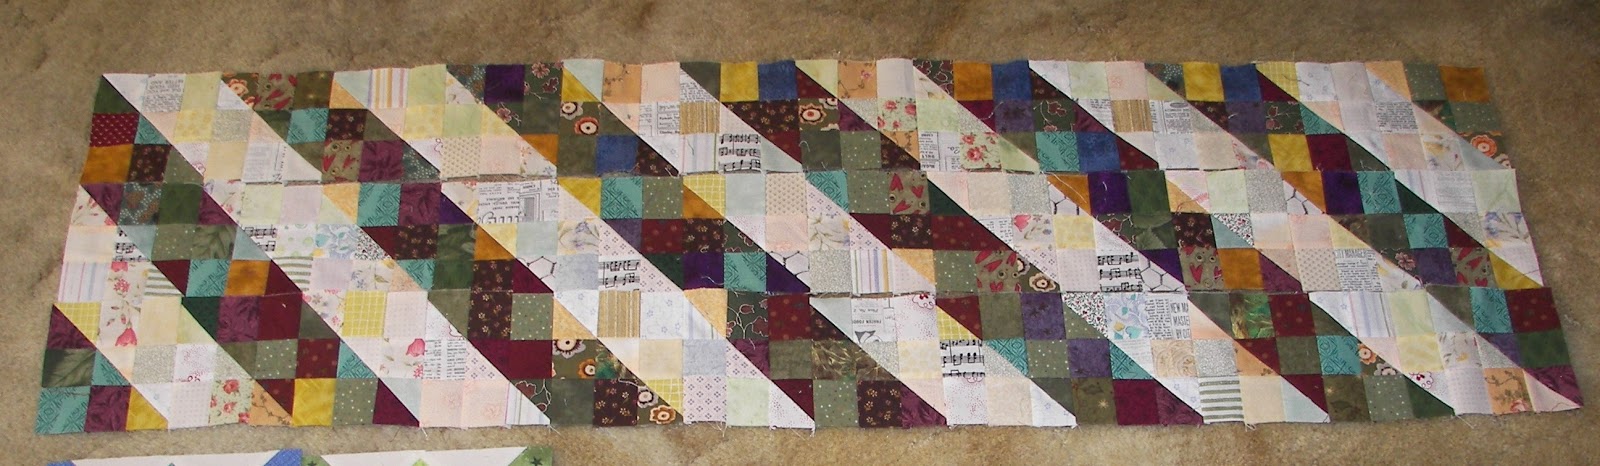
Having fun with Bargello/Trip Around the World, I didn't  understand how a TATW would actually be organized, but in the meantime, during my learning time, these were was a LOT of fun.  I made 4 of each style, and kept the "order" the same for each block - that is 2 strips of darks, one light, one contrast and 2 lights.   Right now, I have 9 sets of 4 blocks and will likely make 3 more sets of 4, using the same order so it ends up rectangular.  Perhaps I'll mix all of these blocks just to see what happens visually.  It's funny, the blocks that I really didn't care for are the ones that ended up looking most interesting.  A few of them laid out 2 one way, and 2 the other.  These are made tube style, Bonnie Hunter method.  
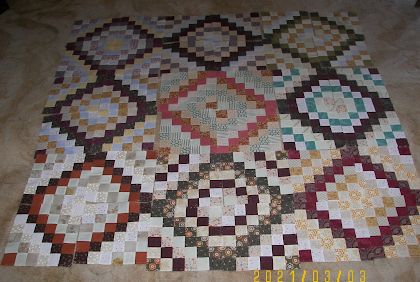

Only too late I realized a "true" TATW would be a whole 'nuther plan.  That plan, yet to happen, is not something done as quickly as these blocks.  Below is a picture taken from Lissa Alexander's book, which I eventually purchased, "Sisterhood of Scraps", more like what I had in mind at first.  The  method in her book takes more organization and a different method of construction - live and learn. 

Here is a jigsaw puzzle finally FINISHED this morning!  Yeaaaaaaaa!  thank you Alice!!!   This lived on my table since before Christmas and was unexpectedly helpful with my frazzled concentration after my husband's passing.   I don't know if that would work for everyone, but it sure kept my brain together, one piece at a time.  One blogger told me she not only made up the same puzzle, but then she made the actual quilt which was beautifully done and quilted.  Wow - who knows what inspires us?  


Sunday, February 23, 2020

Moving Forward, One Step At a Time

80 Garlic Knot blocks from Bonnie Hunter's pattern.  Her method works like a charm, of course.  I made one or two, then sped things up by layering 5-6 deep on my sewing table.  These are 6 in. finished blocks.  And as always, all are scrappy  in purples, pinks greens, a few blues, one or two reds, and the neutral was purchased.  These will be put together with a narrow sashing with "plusses" at the cornerstones.  That's a little tedious but doable.

Thank you all, for you know what.  There is a LOT of work after losing your spouse, even if you planned ahead.  Sometimes work can be a blessing.  The dear man did all he could to make my life easy as possible when he was not here.  Take photos, and say beautiful things to those you love - we each did.  You never know about tomorrow. 

Monday, May 06, 2019

"Slim Pickin's", aka "Daybreak"

This is quilt # 4, from the second Box of Scraps given to me some months ago.  I have 2 other quilts  started, not shown yet, so the box is getting picked over, and by now, I'm having to add bits from my own stash.  The inspiration was Bonnie Hunter, from her latest book, and she calls hers "Daybreak".  Since my fabric choices from that box are now limited, I named mine "Slim Pickin's".   I used scraps in my border where Ms. Hunter used strings.  Both ideas served the same purpose.  This has been the most fun I've had in years - don't know why, perhaps because I'm feeling very "connected" to those frugal ladies of years ago. 


Most of the 4 patches are laid out same direction - a few didn't play the game.  8-))   They are 1 inch square, and the cornerstones are less.   I added fabric for the green/tan sashing and the last 2 cream borders.
   

Monday, April 15, 2019

"Slim Pickin's" - from that box of scraps


These blocks were started about 2 months ago, and are from Bonnie Hunter's latest book, she calls hers "Daybreak".  They went fast, and yes, I pulled much of the fabric from that never-ending gift box of scraps I keep mentioning.  This is 1 project of 6 from that gift box.  (3 others in process)  

Yesterday I spent hours struggling with "the perfect" border, rummaging thru books, Youtube and my brain, all to no avail.  In the end, best solution was, "Keep it simple Stupid"!  The supply of scraps was nearly totally picked over so that's why I named this quilt "Slim Pickin's".  Off to the LQS to match some of the border fabrics!    These border squares are 1 inch finished and I strip pieced them with 4 strips at a time, sometimes piecing the strips to get the needed lengths.  Important - press to the dark on each strata and they go together fast.  


The blocks are set 6 x 7 , and are 9 in. finished.  Here it's folded up on itself - too large for my Design Floor!

Friday, April 12, 2019

"Scraps Rule"

(I MQ on a DSM).  This is the 3rd, finished project from the gifted, never ending box of scraps.  Projects 4, 5, and 6, are in process!!!  

DONE - I used my "stuck-in-the-house" time well (2 blizzards), finishing up this quilt, called "Scraps Rule".  I used rulers on the lights and free-motion quilting on the dark.  Opinion on ruler work ... ??? this is new to me, and it did slow my progress considerably, altho I got faster.  I bought one thick ruler just for this project, but used a traditional 2.5 x 6 in. ruler for the most part.  The MQ foot that I use glides, does not hop, so my traditional quilting ruler (thin) worked well.  I actually broke my expensive MQ ruler somehow, didn't break the needle, just the ruler!  ARGH !  I glued it back together and still wonder how it happened.  The machine quilting foot apparatus somehow came into contact with that thick ruler and WHAM BAM!!! so I'm guessing I put the thick ruler in the wrong place at the wrong time.  

The large triangles are 60 degrees, and the smaller triangles are made with the Tri-Recs ruler.  The quilt measures approx. 70" x 80".

The finished product is visually pleasing, altho my ruler work leaves much to be desired - no quilt show winner here, yet I consider it's completion an accomplishment, considering the lengthy practicing, rethreading, unsewing, sighs of frustration.  I also learned my machine does NOT like to sew in a backward direction when machine quilting.

Here's the back, again making use of stash fabric.  It's "almost" perfectly square. 

This was inspired by Quiltville.com, a free pattern, altho I always end up going in my own direction, once I get "the bug".  Thank you Bonnie Hunter for her fabulous, never-ending ideas. 

Tip on making a backing like this.  I used MSWord to make a graph with the required visual dimensions, then print it out, color in what squares I have to verify I have enuf of each value.  It's worthwhile to consider half squares around the borders. Of course you can just lay them out where they fall but I wanted a defined pattern.  Alternating lights and darks would also be cool, or a kind of Trip Around the World or .... and remember you can piece those backing squares as well, or use leftover blocks or ...

Saturday, March 16, 2019

Blizzard over, time for quilting!

These photos are for my own journey - everyone else in this part of the country has similar photos.  It's been a doozey but thankfully no downed lines, no outages, and temps remained tolerable.  I couldn't get off the deck or anywhere else to take better photos - waaay too much snow, but we all agreed, we were fortunate.  Conditions were NOT fortunate toward the other (eastern) end of the state, where  sadly, floods caused terrible damage.  

Quilting photos are at the end of this post.  

 There is a garden gnome under that 4 ft. drift.  
 My neighbors back door, with a huge drift OVER the fence and right against her back door!
Huge drift (can't even see).  Getting into garage is impossible for now.   Homes are close together - finding somewhere to put snow is an issue.  

To self -- Remember to send a Thank You to the Bulldozer angel who wouldn't accept pay for clearing out the back driveway, and another Thank You to the family who cleared off the snow several days earlier, from the previous snow.  We have wonderful friends and neighbors, even if we don't know them.  
--------------------------------------

OK, Quilt-y stuff now.  I am working on a light/dark zig zag, 60 degree  triangle quilt  inspired  by Bonnie Hunter (free pattern on her site).  This is one of 5 projects, made from the box of scraps given to me.  I am proud of ME for using the gift.  And there is still more left over - perhaps a 6th project?  

Here is how I'm quilting the sides and the light triangles.  The lights are ruler work, the darks are more traditional (free-form) quilting.  It's taking a LONG time, even with this minimal quilting.
 Below - a proper ruler (left one) for Machine Quilting on a DSM, and my standard quilting ruler.  Since my quilting foot does not hop, and because of some interference with machine hardware, the slimmer  "wrong" ruler works well, while the "proper" ruler is less used.  I also replaced the larger, easier to handle screw that holds the foot on.  The replacement is very small, making ruler usage visually easier but I'd better not drop it while screwing that tiny thing in place.  

Below - The mess under the needle.  I have 3-4 rows MQ'ed.  Slow going with that ruler work, but I'm still a beginner. I've succumbed to frequent unstitching.  Solution seems to be where I position the ruler - on the seam or off the seam.  

Triangles seem to invite these wedge lines.  I am drawing the lines with a Frixion pen. They come out with the iron.  Seems like double work to draw them, then use the ruler to stitch them.  Stitching them without the ruler ALMOST produces the same line.  mmmm gotta work on that.  

Saturday, January 12, 2019

New projects: "Daybreak" and "Staying Grounded"

This project is from Bonnie Hunter's newest book, String Frenzy (the one with cheddar and strings on the cover).  I LOVE it but chose not to use strings in the sashings.   She calls the quilt "Daybreak".  I still need to come up with border ideas.  These blocks are  9 in. finished.  Despite the many small pieces, it went together quickly. 


Most of the fabrics in both these quilts were from a gift scrap box from my LQS .  I added a few here and there, but FORCING (almost) myself to use the box contents actually kept me more focused than if I had started rummaging for the "perfect" matching fabrics . 

There are still enough remaining fabric bits for another quilt, probably using bright strings.  Can't wait!  

The triangles in the center of the below quilt are 60 degree and by the time I reached the borders, I couldn't find that ruler again, so I used my Tri-Recs which always seems to turn out well.  Bonnie Hunter used 2 1/2 in. triangles for her center, mine are 4 in., and border triangles are smaller.  And I DID have to purchase the purple border fabric, some is not yet in the photo.  This is another quilt that both my DH and I really LOVE.

(BTW, I did find the lost ruler, exactly where I put it so as NOT to lose it!)  


Tuesday, November 20, 2018

Pre Thanksgiving Enthusiasm

Pumpkin bread, served with cream cheese/honey spread.  I made two, one for Guild meeting, and one for us, but due to snow and bad road conditions, our guild meeting was cancelled - yep, more for us. 


I wanted to use up MORE scraps and leftovers, so started this Strip and Slash technique, by Jackie Robinson.  I've made 5-6 of this previously and enjoy her efficiency method.  I tried to concentrate on greens and yellows but a lot of other stuff gets used as well, which helps to add dimension and interest.  It would be FLAT with just two colors.  I have 400 blocks made and need 50 more - no problem. 


My wonderful LQS gave me another HUGE box of scraps, all new fabrics of course, but bits and pieces of whatever - how exciting I was to open the box, almost like Christmas!  I'm noticing a LOT of purples, blues and greens so decided, once again, to make a quilt from fabric from that box, without adding much of my own stash.  This is Bonnie Hunter's Diamond Tile - I didn't like it at first when seeing it in Quiltmaker's magazine but the design grew on me.  I'm thinking of a narrow sashing but ... we'll see.  The yellow block is kinda blahh  - it was my first.    I'll also change the background on some blocks to something with more character.  They don't take long to make and finish at 7 in.


(Why am I starting new quilts at this busy time of year? )

Friday, October 19, 2018

Garden Party DONE


DONE!

I quilted each of the 4 borders in a different design.  Hey, a gal needs to keep practicing.  I did swirls, circles, paisleys and a leafy/viney thing in the borders.  Red on top, white on back resulted in "pokies" on the back.  The few pokies in the top just needed a permanent Sharpie.  No solution for the back pokies - many efforts -- I finally admitted defeat and called it good!  8-))   Thank you again, Ms. Bonnie Hunter for this fine project.  

The lesson I learned was that I used JUST WHAT WAS IN THE BOX.  No fiddling, trying new fabrics, trying to match, colors, etc.  I DID add the red and white, but somehow, forcing myself to just use what was available, resulted in a faster process, an amazing number of fabric combos that I would never have used before, and a delightful surprise when almost each block looked really fine!  There's a good lesson for all of us who struggle with colors, matching, to the point of over-analysis which leads to paralysis.  

This is 83 in. square - a big  machine quilting project on my domestic machine.  It's easy to make and you can reduce the number of blocks for a smaller quilt.  Bonnie's pattern is in her latest current book.


Fun backing.

Sunday, September 16, 2018

Garden Party - Top DONE


What happened to my plan of "only smaller tops"???   This is 83 x 83".  Frankly it WAS just plain fun to keep using all the combinations of fabric.  mmmm I've said that about a previous quilt  ..."couldn't stop making the blocks." 

The backing is white with quarter-sized polka dots!  Exactly what it needs, MORE COLOR!  LOL 

And yes, it looks exactly like Bonnie Hunter's with same name.  I really didn't want to copy hers - it was just so adventuresome, and tedious, I was afraid to make it any other way.

Tuesday, August 21, 2018

Garden Party - WIP

Here are my parts and pieces, blocks, side setting triangles and corners.  I tallied up all the bits and except for 2 sets of borders, here is the total.  Frankly, I'm surprised that piecing it all did not take longer!   I dislike that my project is nearly the same as Bonnie Hunter's, but hers looked so good, and my colors were as varied as hers, I remembered that old adage, "don't change what ain't broke!"


House painting is getting close to DONE.  Happy Day!

Sunday, July 29, 2018

More is MORE (Garden Party blocks)

The finished blocks will be on point, with an alternate block between them all.  Hah, as I look, I'm see one block needing fixing!  Today I made about 10 -12 for a total of 31 so far - aren't they neat?  Whatever comes out of the box is pretty much what I'm using, but the corners are white or very light. Some of the blocks have a center strip of light, others are dark - interesting.   Digging thru this large box of pre-cut strips is much easier than digging thru my folded stash,.  I might make a Log Cabin or Pineapple of these left overs ... they are all strips of 1 1/2 inches. 

Thanks to Bonnie Hunter of Quiltville.com for this delightful project.

(Large print motifs did not work well.  In the lower right of first photo you can see a mish-mash of nice little cowboy boots - can't even tell what they are.)


Saturday, July 28, 2018

Long time - no see!

This has been the longest time between posting!   There have been Quilt Shows, quilt display, quilt gathering, and even quilt making!  Here is a Scrappy Bargello, ala Quiltville/Bonnie Hunter project.  This will be a donated "Hugs and Stitches".  The orange fabric is Lucy and Linus going Trick or Treating! Each of the blocks used the same 6 fabric combination.  There is an extra checkerboard row at top and bottom to making it rectangular, about 54" x 64".  The appendages belong to DH, about 6'4".


I vowed to use stash for the backing.  That second and 4th pieces are little foxes.


And, finally .... ta dahhhh, my LQS gave me a generous box of quality scraps.  I've looked at those scraps for almost a year and finally decided to do SOMETHING, and cut them ALL into 1 1/2 inch strips.  I saw Bonnie Hunter's "Garden Party" on Youtube and decided that was the exactly the right project. 

These blocks are small (5 in. finished) !  This project uses only 1 1/2 in. strips, and is featured in her book "Addicted to Scraps".  It took me 5-6 blocks to get into a rhythm and then they went faster.  I only finger pressed during construction - saved time.  Here are 24 blocks - 2-3 days worth.   My goal was to use up the fabrics, and I did NOT stress over what colors did or didn't "go" together.  Goodness  - you could spend days just trying to make decisions and matches - just get on with it!!  In the end, they all seem to "go together"!  I've not decided on colors for the second block with cornerstones - was planning to use greens but somehow, RED seems a better choice.  Thank you Bonnie for another great design!


(My New York Beauty block are all done, but not together in rows.  )

Saturday, March 31, 2018

Playing with Cell Phone

I am learning how to take a photo with the newish cell phone, share it to my computer e-mail, save it on desktop, refile it to appropriate photo gallery file, and retrieve it!  Yeahhhhhh!

"We can DO it!" 


This is a pattern from Bonnie Hunter of Quiltville.com, called Scrappy Bargello.  I'm planning each block the same, with 16 blocks, for a Linus type quilt. Our donation center calls them Hugs and Stitches quilts

My Snoopy characters are kinda sparse on that orange background!  I had the other 5 fabrics in my stash, and plans for making 16 blocks at next All Day Sew, but had NO kids prints.  So today, I made a quick dash to my LQS and bought that last few inches of that orange. 

Some of the quilting gals have never made a quilt using this technique so we'll demo it next meeting.  Only trouble is that it's so easy and so cute, I might have it done before the meeting date!

Saturday, March 03, 2018

"Box Kites" - DONE

Today is a lovely warm day to celebrate the finish of my "Box Kites."  It ended up about 72" x 88" - I really didn't want it that large, but apparently I am not planning well enough.  This is a Bonnie Hunter inspiration, from one of her books. 

DH held it high, but almost not high enough.  We've had so much snow, mostly melted now, but the result is a lot of MUD!  I had to jump in and hold up the bottom to keep it off the ground.

I really LOVE, LOVE, LOVE the diagonal lines we see with all the  light "kites".  Each border is MQ'ed differently in light-hearted, happy motifs.


Sunday, February 25, 2018

"Box Kites" -- close to finished!

Funny how sometimes a project seems kinda blah, but you MAKE yourself work on it, and by the time it's finished, it's looking pretty GOOD!  DH teases me how frequently I say, "Hmmmmm, it turned out much better than I thought ."  Is this because it's finished (or in this case, almost finished)?

This was my planned border, and it made up nicely but it just didn't "do"!  Tooooo overwhelming.  So, now I have a border with no quilt! 

I MQ with my domestic machine, a Janome MC6500.  It's a treasure!

So then I decided on an almost plain border.  White with little squiggles in it - much better.  Had to purchase this piece.  That last border is not quilted yet, but I DO have the binding made up, a stripe to match that inner border, only the stripe is on the bias - looks great!

I was inspired by Bonnie Hunter's quilt of the same name.  I wonder if she plans to include this project in her coming book?  I think this would look wonderful if the maker would gather similar colors in the diagonal rows.  Note that the kites are all light while background is color. 

 I included a couple of "cutesies".  This would be a great little girl's quilt.  Measures 72 x 88. 


This backing is wonderful - on sale when a quilt vendor wanted to go back home!  The stripes run vertical.  I quilted it all with Essential Pro creamy white on top and bobbin - this stuff is thin and quilts like buttah!

Monday, February 19, 2018

"Box Kites", WIP, and Boats on the Other Side of the Studio

I've been sloppering with envy over Bonnie Hunter's "Box Kite" quilt for a while, and finally got mine together!  Colors  are purple, green, turquoise, a few pinks and yellows.   All is stash.   Backgrounds are white, no beige or creams.  The design shows up as light strips diagonally across the quilt.  The diagonal pattern is not very apparent in these 2 photos, but I wanted to get something fresh on my blog - so here's a start!  I'm machine quilting on my DSM, my trusty Janome MC6500.  We are under a storm warning today, Presidents Day, and while bad weather doesn't seem to have actually happened, I planned time to make progress with the MQ'ing. 

Mine is 130 blocks - once again, larger than originally planned - I can't seem to stop at "nap size"!   It is finishing approx. 72" x 92".   Most of the fabrics are kinda sweet, clear, a lot of polka dots, and a few "cutsies".  The little stripe is one border.  This is an easy, 6 in. block.  If I had a design wall, I would have clustered like colors together but ... no design wall.


Other side of the studio:  

While I work on my quilts, DH works on his boats.  While it starts as a kit, he is building an entire boat, only on a smaller scale.  The wood is included, and instructions, but nothing is cut out, the instructions are frequently in several foreign languages with the expected problems of language errors, measurement conversions, pieces get broken under the stress of making straight wood curve, clamps won't stay clamped on curved surfaces.  We both use a small studio - he is in one corner and I am in the other corner.  He gets threads in his boats, I have sawdust in my quilt - we got over it. 

This morning at 3:45am one of those clamps went flying off, noisily clunking to the chair then the floor -- waking us in a panic - we were sure someone had broken into the house!    


Thursday, December 28, 2017

"Bugs and Boats", and more Boats and Toys

Where did the month go?  mmmm a trunk show and preparations  ... photos are still not loaded onto Photo Bucket thingy .... hope I remember how to do them.

This little Bargello quilt turned out very attractive -- I named it "Bugs and Boats", a Bonnie Hunter inspiration.  I had purchased a lot of that dark fabric a while ago, thinking the red splotches were  flowers - but when I got home, those red splotches turned out to be ladybugs.  Kinda hard to add bugs to any quilt except for a boy, so it's lasted a LONG time.  The light fabrics are "boaty" and boyishy, and kids playing.  Some of the other fabric was donated by Kathy, a quilty friend who passed away last year.  Many people benefited from her fabric gifts, and she remains with us in many ways.  8-)))

Backing is all from stash.   (Yes, it's laying out in the snow!)


New subject -- My husband is still making boats, always,  he works with wood, but this time he decided to try LEGO!  Wow, they offer an array of high-end, expensive models.  We both fought the thought that they are just for kids and he decided to try one. 

 The little "men" are just so cute - it's difficult not to smile at them - one even has a goatee!  This project has been filled with laughter and smiles!
Have we lost our minds?  LOLOL

More boats - called a Modified Landing Craft, inspired by a boating magazine.  The boat is scratch built, but the best parts are the little "toys" we added.   OH MY - we had fun picking out the most suitable vehicles.